Introduction
The React Native New Architecture represents the most significant technical evolution of the framework since its inception. After years of development and gradual rollout, the New Architecture is now mature and becoming the default for new projects.
If you are maintaining a React Native app that has not yet migrated, now is the time. The ecosystem has caught up, most popular libraries support the New Architecture, and the performance benefits are substantial.
This guide provides a complete walkthrough for migrating existing apps. We cover the conceptual changes, practical migration steps, and strategies for handling libraries that have not yet migrated.
Understanding the New Architecture
Before diving into migration, understanding what changed and why helps you make better decisions during the process.
The Old Architecture’s Limitations
The original React Native architecture relied on a JavaScript bridge for all communication between JavaScript and native code:
JavaScript -> JSON serialization -> Bridge -> Native
Native -> JSON serialization -> Bridge -> JavaScript
This bridge created several problems:
Serialisation overhead: Every message required JSON encoding and decoding, adding latency to every native call.
Asynchronous communication: The bridge was fully asynchronous, making synchronous operations impossible.
No type safety: The bridge had no way to verify that JavaScript and native code agreed on data structures.
Single-threaded bottleneck: All bridge traffic passed through a single queue, creating contention.
The New Architecture’s Solutions
The New Architecture replaces the bridge with three interconnected systems:
JavaScript Interface (JSI): Direct bindings between JavaScript and C++, eliminating serialisation entirely.
TurboModules: Native modules that leverage JSI for synchronous, type-safe calls.
Fabric: A new rendering engine that uses JSI for direct manipulation of native views.
JavaScript ↔ JSI ↔ C++ ↔ Native
(No serialisation, synchronous when needed)
Performance Improvements
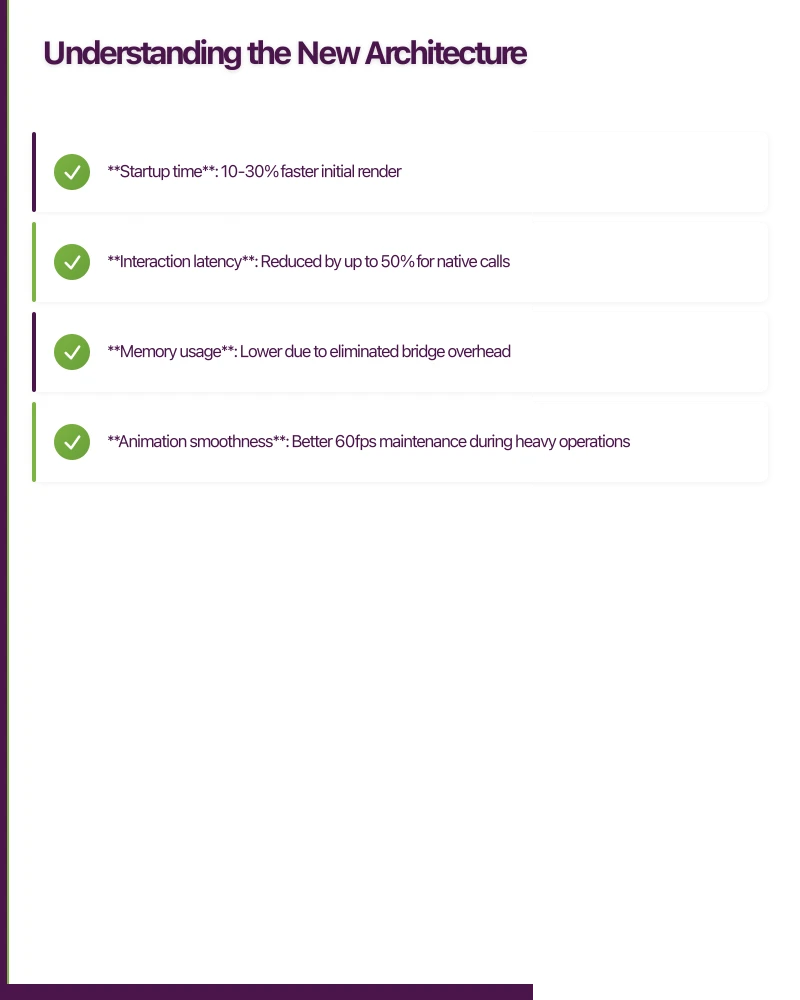
Real-world performance gains from the New Architecture include:
- Startup time: 10-30% faster initial render
- Interaction latency: Reduced by up to 50% for native calls
- Memory usage: Lower due to eliminated bridge overhead
- Animation smoothness: Better 60fps maintenance during heavy operations
Prerequisites f
or Migration
Version Requirements
Ensure your project meets these minimum versions:
- React Native 0.76+ (as of late 2025, New Architecture is default)
- React 18.2+
- Node.js 18+
- Xcode 15+ (for iOS)
- Android Studio Hedgehog+ with NDK 25+
Project Assessment
Before starting, audit your dependencies:
# Check all dependencies for New Architecture compatibility
npx react-native-new-architecture-check

# Or manually check key libraries
npm info react-native-reanimated | grep newArchitecture
npm info @react-navigation/native | grep newArchitecture
Create a dependency compatibility matrix:
| Library | Version | New Arch Support |
|---|---|---|
| react-native-reanimated | 3.6+ | Yes |
| @react-navigation/native | 6.1+ | Yes |
| react-native-gesture-handler | 2.14+ | Yes |
| react-native-screens | 3.29+ | Yes |
Most popular libraries now support the New Architecture. Libraries without support will need bridging or replacement.
Enabling the New Archi
tecture
For New Projects
React Native 0.76+ enables the New Architecture by default. No additional configuration needed.
For Existing Projects
iOS Configuration
Edit ios/Podfile:
# ios/Podfile
platform :ios, '13.4'

# Enable New Architecture
ENV['RCT_NEW_ARCH_ENABLED'] = '1'

target 'YourApp' do
  config = use_native_modules!

  use_react_native!(
    :path => config[:reactNativePath],
    :hermes_enabled => true,
    :fabric_enabled => true,
    :app_path => "#{Pod::Config.instance.installation_root}/.."
  )

  post_install do |installer|
    react_native_post_install(
      installer,
      config[:reactNativePath],
      :mac_catalyst_enabled => false
    )
  end
end
Reinstall pods:
cd ios
pod deintegrate
pod install
Android Configuration
Edit android/gradle.properties:
# android/gradle.properties
newArchEnabled=true
hermesEnabled=true
Sync and rebuild:
cd android
./gradlew clean
Verify New Architecture is Active
Add this check to your App.tsx:
import React, { useEffect } from 'react';
import { View, Text, TurboModuleRegistry } from 'react-native';

function App() {
  useEffect(() => {
    const isNewArchEnabled = global.__turboModuleProxy != null;
    console.log('New Architecture enabled:', isNewArchEnabled);

    // Check for Fabric
    const isFabricEnabled = global.nativeFabricUIManager != null;
    console.log('Fabric enabled:', isFabricEnabled);
  }, []);

  return (
    <View style={{ flex: 1, justifyContent: 'center', alignItems: 'center' }}>
      <Text>Hello New Architecture!</Text>
    </View>
  );
}

export default App;
Migrating Native Modules to TurboModules
If you have custom native modules, they need updating for the New Architecture.
Understanding TurboModules
TurboModules differ from legacy native modules in key ways:
- Type definitions come from JavaScript (via Codegen)
- Calls can be synchronous when needed
- Lazy loading by default (modules loaded only when first used)
Step 1: Create the TypeScript Specification
Create a specification file that defines your module’s interface:
// src/specs/NativeCalculator.ts
import type { TurboModule } from 'react-native';
import { TurboModuleRegistry } from 'react-native';

export interface Spec extends TurboModule {
  // Synchronous method
  add(a: number, b: number): number;

  // Asynchronous method
  multiply(a: number, b: number): Promise<number>;

  // Method with callback
  divide(
    a: number,
    b: number,
    onSuccess: (result: number) => void,
    onError: (error: string) => void
  ): void;

  // Constants
  getConstants(): {
    PI: number;
    E: number;
  };
}

export default TurboModuleRegistry.getEnforcing<Spec>('Calculator');
Step 2: Configure Codegen
Add Codegen configuration to your package.json:
{
  "name": "your-app",
  "version": "1.0.0",
  "codegenConfig": {
    "name": "YourAppSpecs",
    "type": "modules",
    "jsSrcsDir": "src/specs",
    "android": {
      "javaPackageName": "com.yourapp.specs"
    }
  }
}
Step 3: Implement iOS TurboModule
// ios/Calculator/RCTCalculatorModule.h
#import <React/RCTBridgeModule.h>
#import <YourAppSpecs/YourAppSpecs.h>

NS_ASSUME_NONNULL_BEGIN

@interface RCTCalculatorModule : NSObject <NativeCalculatorSpec>
@end

NS_ASSUME_NONNULL_END
// ios/Calculator/RCTCalculatorModule.mm
#import "RCTCalculatorModule.h"
@implementation RCTCalculatorModule
RCT_EXPORT_MODULE(Calculator)
- (std::shared_ptr<facebook::react::TurboModule>)getTurboModule:
(const facebook::react::ObjCTurboModule::InitParams &)params
{
return std::make_shared<facebook::react::NativeCalculatorSpecJSI>(params);
}
- (NSNumber *)add:(double)a b:(double)b {
return @(a + b);
}
- (void)multiply:(double)a b:(double)b
resolve:(RCTPromiseResolveBlock)resolve
reject:(RCTPromiseRejectBlock)reject {
resolve(@(a * b));
}
- (void)divide:(double)a b:(double)b
onSuccess:(RCTResponseSenderBlock)onSuccess
onError:(RCTResponseSenderBlock)onError {
if (b == 0) {
onError(@[@"Division by zero"]);
return;
}
onSuccess(@[@(a / b)]);
}
- (NSDictionary *)getConstants {
return @{
@"PI": @(M_PI),
@"E": @(M_E)
};
}
@endStep 4: Implement Android TurboModule
// android/app/src/main/java/com/yourapp/calculator/CalculatorModule.kt
package com.yourapp.calculator

import com.facebook.react.bridge.Promise
import com.facebook.react.bridge.ReactApplicationContext
import com.facebook.react.bridge.Callback
import com.yourapp.specs.NativeCalculatorSpec

class CalculatorModule(reactContext: ReactApplicationContext) :
    NativeCalculatorSpec(reactContext) {

    override fun getName(): String = NAME

    override fun add(a: Double, b: Double): Double {
        return a + b
    }

    override fun multiply(a: Double, b: Double, promise: Promise) {
        promise.resolve(a * b)
    }

    override fun divide(
        a: Double,
        b: Double,
        onSuccess: Callback,
        onError: Callback
    ) {
        if (b == 0.0) {
            onError.invoke("Division by zero")
            return
        }
        onSuccess.invoke(a / b)
    }

    override fun getTypedExportedConstants(): Map<String, Any> {
        return mapOf(
            "PI" to Math.PI,
            "E" to Math.E
        )
    }

    companion object {
        const val NAME = "Calculator"
    }
}
// android/app/src/main/java/com/yourapp/calculator/CalculatorPackage.kt
package com.yourapp.calculator
import com.facebook.react.TurboReactPackage
import com.facebook.react.bridge.NativeModule
import com.facebook.react.bridge.ReactApplicationContext
import com.facebook.react.module.model.ReactModuleInfo
import com.facebook.react.module.model.ReactModuleInfoProvider
class CalculatorPackage : TurboReactPackage() {
override fun getModule(name: String, reactContext: ReactApplicationContext): NativeModule? {
return if (name == CalculatorModule.NAME) {
CalculatorModule(reactContext)
} else {
null
}
}
override fun getReactModuleInfoProvider(): ReactModuleInfoProvider {
return ReactModuleInfoProvider {
mapOf(
CalculatorModule.NAME to ReactModuleInfo(
CalculatorModule.NAME,
CalculatorModule.NAME,
false, // canOverrideExistingModule
false, // needsEagerInit
true, // isTurboModule
false // hasConstants
)
)
}
}
}Step 5: Use the TurboModule
import NativeCalculator from './specs/NativeCalculator';

function CalculatorScreen() {
  const [result, setResult] = useState<number | null>(null);

  const handleAdd = () => {
    // Synchronous call
    const sum = NativeCalculator.add(5, 3);
    setResult(sum);
  };

  const handleMultiply = async () => {
    // Asynchronous call
    const product = await NativeCalculator.multiply(5, 3);
    setResult(product);
  };

  const handleDivide = () => {
    // Callback-based call
    NativeCalculator.divide(
      10,
      2,
      (result) => setResult(result),
      (error) => console.error(error)
    );
  };

  // Access constants
  const { PI, E } = NativeCalculator.getConstants();

  return (
    <View>
      <Text>PI: {PI}</Text>
      <Text>E: {E}</Text>
      <Button title="Add" onPress={handleAdd} />
      <Button title="Multiply" onPress={handleMultiply} />
      <Button title="Divide" onPress={handleDivide} />
      {result !== null && <Text>Result: {result}</Text>}
    </View>
  );
}
Migrating Native Views to Fabric
Native UI components also need updating for the Fabric renderer.
Step 1: Create the View Specification
// src/specs/NativeCustomButtonViewNativeComponent.ts
import type { ViewProps } from 'react-native';
import type { HostComponent } from 'react-native';
import codegenNativeComponent from 'react-native/Libraries/Utilities/codegenNativeComponent';
import codegenNativeCommands from 'react-native/Libraries/Utilities/codegenNativeCommands';
import type { DirectEventHandler, Int32 } from 'react-native/Libraries/Types/CodegenTypes';

type OnPressEvent = Readonly<{
  timestamp: Int32;
}>;

export interface NativeProps extends ViewProps {
  title: string;
  disabled?: boolean;
  color?: string;
  onPress?: DirectEventHandler<OnPressEvent>;
}

export interface NativeCommands {
  flash: (viewRef: React.ElementRef<HostComponent<NativeProps>>) => void;
}

export const Commands: NativeCommands = codegenNativeCommands<NativeCommands>({
  supportedCommands: ['flash'],
});

export default codegenNativeComponent<NativeProps>('CustomButton');
Step 2: Implement iOS Fabric Component
// ios/CustomButton/RCTCustomButtonComponentView.h
#import <React/RCTViewComponentView.h>
#import <UIKit/UIKit.h>

NS_ASSUME_NONNULL_BEGIN

@interface RCTCustomButtonComponentView : RCTViewComponentView
@end

NS_ASSUME_NONNULL_END
// ios/CustomButton/RCTCustomButtonComponentView.mm
#import "RCTCustomButtonComponentView.h"
#import <react/renderer/components/YourAppSpecs/ComponentDescriptors.h>
#import <react/renderer/components/YourAppSpecs/EventEmitters.h>
#import <react/renderer/components/YourAppSpecs/Props.h>
#import <react/renderer/components/YourAppSpecs/RCTComponentViewHelpers.h>
using namespace facebook::react;
@interface RCTCustomButtonComponentView () <RCTCustomButtonViewProtocol>
@end
@implementation RCTCustomButtonComponentView {
UIButton *_button;
}
+ (ComponentDescriptorProvider)componentDescriptorProvider
{
return concreteComponentDescriptorProvider<CustomButtonComponentDescriptor>();
}
- (instancetype)initWithFrame:(CGRect)frame
{
if (self = [super initWithFrame:frame]) {
_button = [UIButton buttonWithType:UIButtonTypeSystem];
[_button addTarget:self
action:@selector(handlePress)
forControlEvents:UIControlEventTouchUpInside];
[self addSubview:_button];
}
return self;
}
- (void)updateProps:(const Props::Shared &)props oldProps:(const Props::Shared &)oldProps
{
const auto &oldViewProps = *std::static_pointer_cast<const CustomButtonProps>(_props);
const auto &newViewProps = *std::static_pointer_cast<const CustomButtonProps>(props);
if (oldViewProps.title != newViewProps.title) {
NSString *title = [NSString stringWithUTF8String:newViewProps.title.c_str()];
[_button setTitle:title forState:UIControlStateNormal];
}
if (oldViewProps.disabled != newViewProps.disabled) {
_button.enabled = !newViewProps.disabled;
}
[super updateProps:props oldProps:oldProps];
}
- (void)layoutSubviews
{
[super layoutSubviews];
_button.frame = self.bounds;
}
- (void)handlePress
{
const auto &props = *std::static_pointer_cast<const CustomButtonProps>(_props);
if (props.disabled) return;
CustomButtonEventEmitter::OnPress event;
event.timestamp = [[NSDate date] timeIntervalSince1970] * 1000;
std::static_pointer_cast<const CustomButtonEventEmitter>(_eventEmitter)->onPress(event);
}
// Native Commands
- (void)flash
{
[UIView animateWithDuration:0.1 animations:^{
self->_button.alpha = 0.5;
} completion:^(BOOL finished) {
[UIView animateWithDuration:0.1 animations:^{
self->_button.alpha = 1.0;
}];
}];
}
@endStep 3: Implement Android Fabric Component
// android/app/src/main/java/com/yourapp/custombutton/CustomButtonManager.kt
package com.yourapp.custombutton

import android.view.View
import com.facebook.react.module.annotations.ReactModule
import com.facebook.react.uimanager.SimpleViewManager
import com.facebook.react.uimanager.ThemedReactContext
import com.facebook.react.uimanager.ViewManagerDelegate
import com.facebook.react.uimanager.annotations.ReactProp
import com.facebook.react.viewmanagers.CustomButtonManagerDelegate
import com.facebook.react.viewmanagers.CustomButtonManagerInterface

@ReactModule(name = CustomButtonManager.NAME)
class CustomButtonManager :
    SimpleViewManager<CustomButtonView>(),
    CustomButtonManagerInterface<CustomButtonView> {

    private val delegate = CustomButtonManagerDelegate(this)

    override fun getDelegate(): ViewManagerDelegate<CustomButtonView> = delegate

    override fun getName(): String = NAME

    override fun createViewInstance(context: ThemedReactContext): CustomButtonView {
        return CustomButtonView(context)
    }

    @ReactProp(name = "title")
    override fun setTitle(view: CustomButtonView, title: String?) {
        view.setTitle(title ?: "")
    }

    @ReactProp(name = "disabled")
    override fun setDisabled(view: CustomButtonView, disabled: Boolean) {
        view.isEnabled = !disabled
    }

    @ReactProp(name = "color")
    override fun setColor(view: CustomButtonView, color: String?) {
        color?.let { view.setButtonColor(it) }
    }

    override fun flash(view: CustomButtonView) {
        view.flash()
    }

    companion object {
        const val NAME = "CustomButton"
    }
}
// android/app/src/main/java/com/yourapp/custombutton/CustomButtonView.kt
package com.yourapp.custombutton
import android.animation.ObjectAnimator
import android.content.Context
import android.graphics.Color
import android.widget.Button
import android.widget.FrameLayout
import com.facebook.react.bridge.ReactContext
import com.facebook.react.uimanager.UIManagerHelper
import com.yourapp.specs.events.CustomButtonOnPressEvent
class CustomButtonView(context: Context) : FrameLayout(context) {
private val button: Button = Button(context).apply {
setOnClickListener {
emitOnPress()
}
}
init {
addView(button, LayoutParams(LayoutParams.MATCH_PARENT, LayoutParams.MATCH_PARENT))
}
fun setTitle(title: String) {
button.text = title
}
fun setButtonColor(color: String) {
try {
button.setBackgroundColor(Color.parseColor(color))
} catch (e: IllegalArgumentException) {
// Invalid color, ignore
}
}
fun flash() {
ObjectAnimator.ofFloat(this, "alpha", 1f, 0.5f, 1f).apply {
duration = 200
start()
}
}
private fun emitOnPress() {
val reactContext = context as ReactContext
val surfaceId = UIManagerHelper.getSurfaceId(this)
val eventDispatcher = UIManagerHelper.getEventDispatcherForReactTag(reactContext, id)
eventDispatcher?.dispatchEvent(
CustomButtonOnPressEvent(surfaceId, id, System.currentTimeMillis().toInt())
)
}
}Step 4: Use the Fabric Component
import React, { useRef } from 'react';
import { View } from 'react-native';
import CustomButton, { Commands } from './specs/NativeCustomButtonViewNativeComponent';

function MyScreen() {
  const buttonRef = useRef(null);

  const handlePress = (event) => {
    console.log('Button pressed at:', event.nativeEvent.timestamp);

    // Call native command
    if (buttonRef.current) {
      Commands.flash(buttonRef.current);
    }
  };

  return (
    <View style={{ flex: 1, padding: 20 }}>
      <CustomButton
        ref={buttonRef}
        title="Click Me"
        color="#007AFF"
        onPress={handlePress}
        style={{ height: 50 }}
      />
    </View>
  );
}
Handling Incompatible Libraries
Not all third-party libraries have migrated. Here are strategies for dealing with them.
Interop Layers
React Native provides interop layers that allow old-architecture components to work with the New Architecture:
// For a legacy native module
import { NativeModules } from 'react-native';
const { LegacyModule } = NativeModules;

// This still works with New Architecture
LegacyModule.doSomething();
The performance benefits are reduced, but functionality is maintained.
Creating Wrapper Components
For legacy view managers:
// components/LegacyViewWrapper.tsx
import React from 'react';
import { requireNativeComponent, ViewProps } from 'react-native';

interface LegacyViewProps extends ViewProps {
  customProp?: string;
}

// Legacy view manager still works
const LegacyView = requireNativeComponent<LegacyViewProps>('LegacyView');

export function LegacyViewWrapper(props: LegacyViewProps) {
  return <LegacyView {...props} />;
}
Finding Alternative Libraries
For critical libraries without New Architecture support, consider:
- Check GitHub issues: Often, community members have PRs in progress
- Alternative libraries: Libraries like
expo-*often have early New Architecture support - Fork and migrate: For essential libraries, consider contributing the migration
Progressive Migration
You don’t have to migrate everything at once. The interop layer allows gradual migration:
- Enable New Architecture
- Identify performance-critical native modules
- Migrate those first
- Leave less critical modules in legacy mode
- Migrate or replace remaining modules over time
Testing the Migration
Automated Testing
Ensure your test suite passes with the New Architecture:
# Run tests with New Architecture enabled
RCT_NEW_ARCH_ENABLED=1 npm test

# iOS
cd ios
RCT_NEW_ARCH_ENABLED=1 pod install
npm run ios

# Android
cd android
./gradlew app:testDebug
Manual Testing Checklist
- App launches without crashes
- All screens render correctly
- Animations are smooth
- Native modules function properly
- Custom native views display correctly
- Gestures and touch handling work
- Performance is equal or better than before
Performance Comparison
Measure key metrics before and after:
import { PerformanceObserver, performance } from 'react-native-performance';

// Measure time to interactive
performance.mark('app_start');

// In your App component
useEffect(() => {
  performance.mark('app_ready');
  performance.measure('startup', 'app_start', 'app_ready');

  const entry = performance.getEntriesByName('startup')[0];
  console.log('Startup time:', entry.duration);
}, []);
Troubleshooting
Common iOS Issues
Build error: “Unknown type name ‘TurboModule’”
Ensure Codegen ran successfully:
cd ios
pod deintegrate
pod install
Linker error: “Undefined symbol”
Check that your Podfile includes the correct architecture settings:
post_install do |installer|
  react_native_post_install(installer, config[:reactNativePath])
  installer.pods_project.targets.each do |target|
    target.build_configurations.each do |config|
      config.build_settings['EXCLUDED_ARCHS[sdk=iphonesimulator*]'] = 'arm64'
    end
  end
end
Common Android Issues
“Cannot find generated class”
Ensure Codegen generated files exist:
cd android
./gradlew generateCodegenArtifactsFromSchema
Crash on startup with TurboModule
Verify your module is registered correctly in the package’s getReactModuleInfoProvider().
Conclusion
Migrating to the React Native New Architecture is a significant investment, but the returns are substantial. Improved performance, type safety, and access to synchronous native calls unlock capabilities that were impossible with the old bridge.
Start with enabling the New Architecture and using the interop layer. Migrate custom native modules and views incrementally, prioritising performance-critical components. Most third-party libraries now support the New Architecture, and the remaining few can continue working through interop.
The React Native team has made migration progressively easier with each release. If you have delayed migration, now is an excellent time to begin.
Migrating a large React Native codebase to the New Architecture? Our team has completed migrations for apps with millions of users. Contact us to discuss your project.
Launching an app? You’ll need a website to support it. Cosmos Web Tech builds app landing pages and marketing sites for Australian businesses.
Ashish Ganda is the founder of Ganda Tech Services, a Sydney-based technology consultancy helping Australian businesses grow through cloud, web, and mobile solutions.
Talk to a Sydney app developer — free.
30 minutes. We'll tell you what your app needs, how long it takes, and what it costs. Real answers, no sales pitch.
Book Free App Strategy Call →Free · 30 minutes · No obligation