Introduction
Manual testing simply cannot keep pace with modern mobile release cycles. When you are shipping updates weekly or even daily, spending hours clicking through your app before each release is not sustainable. Testing automation has become essential infrastructure for any serious mobile development team.
The mobile testing landscape has evolved significantly over the past few years. While tools like Appium dominated earlier, 2026 has seen Detox and Maestro emerge as the preferred choices for most development teams. Each brings unique strengths that address different testing needs.
This guide covers everything you need to implement effective testing automation using both tools. We will walk through real configuration, practical examples, and the patterns that work in production. By the end, you will have actionable knowledge to significantly improve your app’s reliability.
Why Mobile Testing Automation Matters
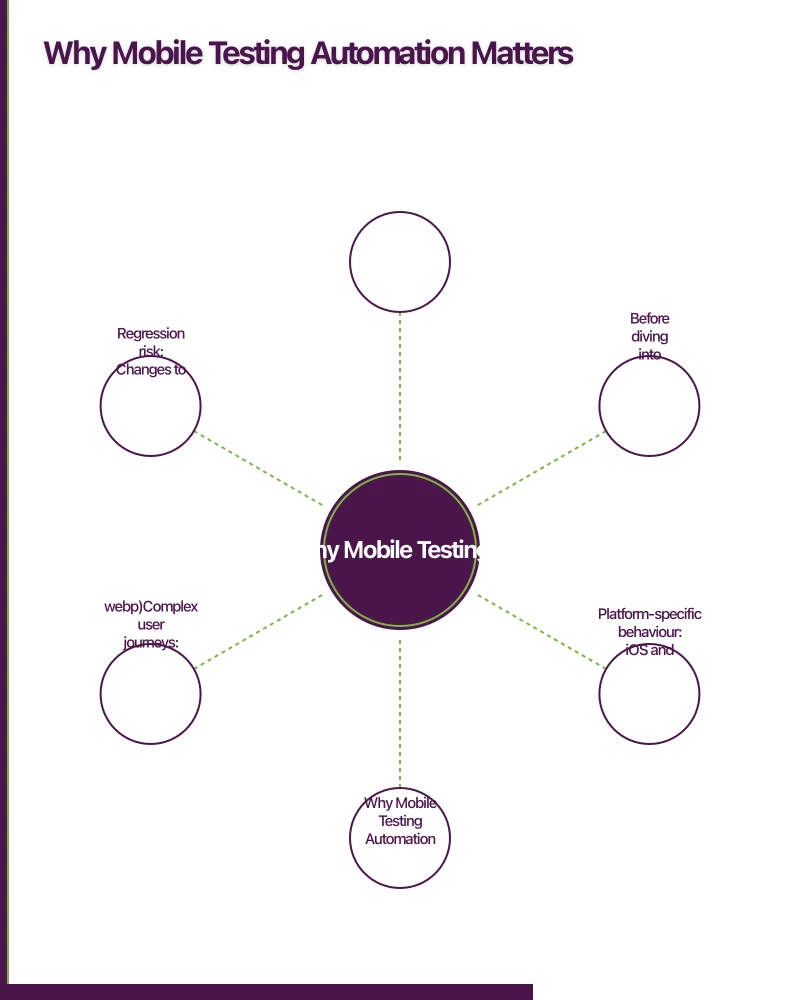
Before diving into tools, let us establish why testing automation is worth the investment. Mobile apps face challenges that web applications do not:
Device fragmentation: Your app runs on thousands of device configurations with different screen sizes, OS versions, and hardware capabilities.
Platform-specific behaviour: iOS and Android handle gestures, navigation, and background states differently.
Complex user journeys: Mobile apps often involve multi-step flows like authentication, payments, and media handling.
Regression risk: Changes to shared components can break functionality across multiple screens.
Automated testing catches these issues before your users do. Teams with comprehensive test suites ship faster with fewer production bugs. The initial investment in automation pays dividends throughout the app lifecycle.
Unde
 rstanding Detox
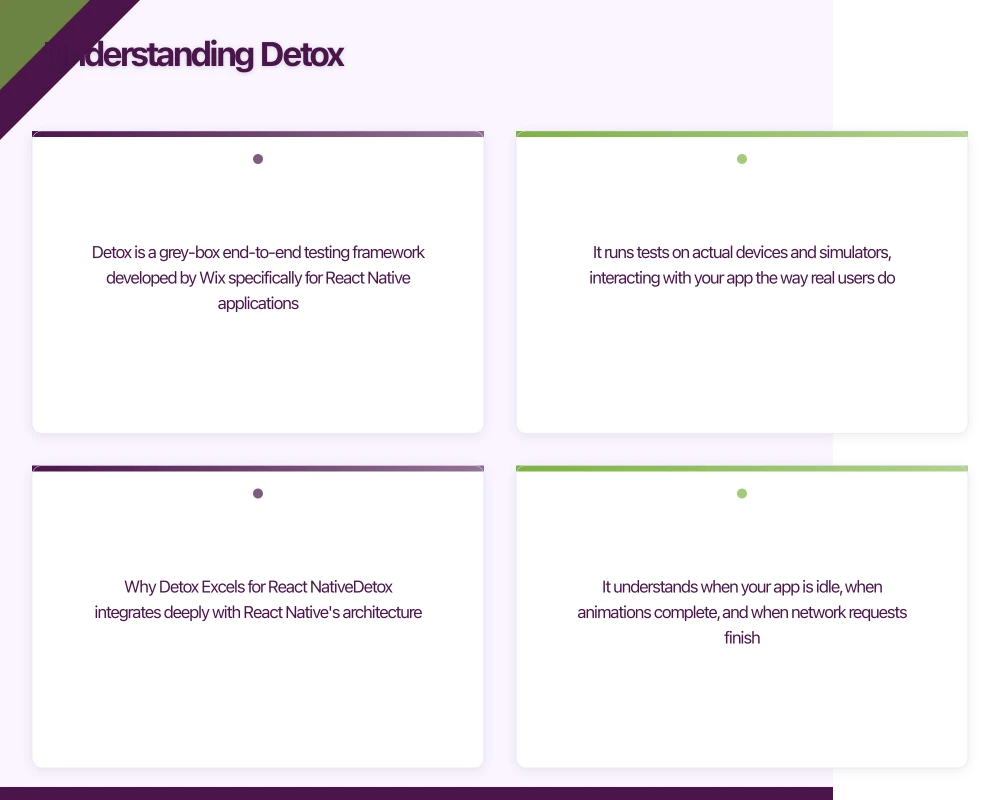
Detox is a grey-box end-to-end testing framework developed by Wix specifically for React Native applications. It runs tests on actual devices and simulators, interacting with your app the way real users do.
Why Detox Excels for React Native
Detox integrates deeply with React Native’s architecture. It understands when your app is idle, when animations complete, and when network requests finish. This synchronisation eliminates the flaky tests that plague other frameworks.
The grey-box approach means Detox has visibility into your app’s internal state. It automatically waits for the JavaScript thread to become idle before proceeding with test actions. This eliminates arbitrary waits and makes tests reliable.
Setting Up Detox
First, install Detox and its dependencies:
# Install Detox CLI globally
npm install -g detox-cli

# Add Detox to your project
npm install --save-dev detox

# For iOS, ensure you have the required tools
brew tap wix/brew
brew install applesimutils
Configure Detox in your project’s .detoxrc.js:
/** @type {Detox.DetoxConfig} */
module.exports = {
  testRunner: {
    args: {
      '$0': 'jest',
      config: 'e2e/jest.config.js'
    },
    jest: {
      setupTimeout: 120000
    }
  },
  apps: {
    'ios.debug': {
      type: 'ios.app',
      binaryPath: 'ios/build/Build/Products/Debug-iphonesimulator/YourApp.app',
      build: 'xcodebuild -workspace ios/YourApp.xcworkspace -scheme YourApp -configuration Debug -sdk iphonesimulator -derivedDataPath ios/build'
    },
    'ios.release': {
      type: 'ios.app',
      binaryPath: 'ios/build/Build/Products/Release-iphonesimulator/YourApp.app',
      build: 'xcodebuild -workspace ios/YourApp.xcworkspace -scheme YourApp -configuration Release -sdk iphonesimulator -derivedDataPath ios/build'
    },
    'android.debug': {
      type: 'android.apk',
      binaryPath: 'android/app/build/outputs/apk/debug/app-debug.apk',
      build: 'cd android && ./gradlew assembleDebug assembleAndroidTest -DtestBuildType=debug && cd ..',
      reversePorts: [8081]
    },
    'android.release': {
      type: 'android.apk',
      binaryPath: 'android/app/build/outputs/apk/release/app-release.apk',
      build: 'cd android && ./gradlew assembleRelease assembleAndroidTest -DtestBuildType=release && cd ..'
    }
  },
  devices: {
    simulator: {
      type: 'ios.simulator',
      device: {
        type: 'iPhone 15 Pro'
      }
    },
    emulator: {
      type: 'android.emulator',
      device: {
        avdName: 'Pixel_7_API_34'
      }
    }
  },
  configurations: {
    'ios.sim.debug': {
      device: 'simulator',
      app: 'ios.debug'
    },
    'ios.sim.release': {
      device: 'simulator',
      app: 'ios.release'
    },
    'android.emu.debug': {
      device: 'emulator',
      app: 'android.debug'
    },
    'android.emu.release': {
      device: 'emulator',
      app: 'android.release'
    }
  }
};
Create a Jest configuration for your e2e tests at e2e/jest.config.js:
/** @type {import('@jest/types').Config.InitialOptions} */
module.exports = {
  rootDir: '..',
  testMatch: ['<rootDir>/e2e/**/*.test.js'],
  testTimeout: 120000,
  maxWorkers: 1,
  globalSetup: 'detox/runners/jest/globalSetup',
  globalTeardown: 'detox/runners/jest/globalTeardown',
  reporters: ['detox/runners/jest/reporter'],
  testEnvironment: 'detox/runners/jest/testEnvironment',
  verbose: true
};
Writing Detox Tests
Detox tests use a declarative syntax for finding elements and performing actions:
// e2e/login.test.js
describe('Login Flow', () => {
  beforeAll(async () => {
    await device.launchApp();
  });

  beforeEach(async () => {
    await device.reloadReactNative();
  });

  it('should display login screen on app launch', async () => {
    await expect(element(by.id('login-screen'))).toBeVisible();
    await expect(element(by.id('email-input'))).toBeVisible();
    await expect(element(by.id('password-input'))).toBeVisible();
    await expect(element(by.id('login-button'))).toBeVisible();
  });

  it('should show error for invalid credentials', async () => {
    await element(by.id('email-input')).typeText('[email protected]');
    await element(by.id('password-input')).typeText('wrongpassword');
    await element(by.id('login-button')).tap();

    await expect(element(by.id('error-message'))).toBeVisible();
    await expect(element(by.text('Invalid email or password'))).toBeVisible();
  });

  it('should navigate to home screen after successful login', async () => {
    await element(by.id('email-input')).typeText('[email protected]');
    await element(by.id('password-input')).typeText('correctpassword');
    await element(by.id('login-button')).tap();

    await expect(element(by.id('home-screen'))).toBeVisible();
    await expect(element(by.id('welcome-message'))).toBeVisible();
  });

  it('should handle forgot password flow', async () => {
    await element(by.id('forgot-password-link')).tap();
    await expect(element(by.id('forgot-password-screen'))).toBeVisible();

    await element(by.id('reset-email-input')).typeText('[email protected]');
    await element(by.id('send-reset-button')).tap();

    await expect(element(by.text('Reset email sent'))).toBeVisible();
  });
});
Add testIDs to your React Native components to enable element selection:
// LoginScreen.tsx
import React, { useState } from 'react';
import { View, TextInput, TouchableOpacity, Text } from 'react-native';

export function LoginScreen() {
  const [email, setEmail] = useState('');
  const [password, setPassword] = useState('');
  const [error, setError] = useState('');

  const handleLogin = async () => {
    try {
      await authenticateUser(email, password);
      navigation.navigate('Home');
    } catch (err) {
      setError('Invalid email or password');
    }
  };

  return (
    <View testID="login-screen">
      <TextInput
        testID="email-input"
        value={email}
        onChangeText={setEmail}
        placeholder="Email"
        keyboardType="email-address"
        autoCapitalize="none"
      />
      <TextInput
        testID="password-input"
        value={password}
        onChangeText={setPassword}
        placeholder="Password"
        secureTextEntry
      />
      {error ? (
        <Text testID="error-message">{error}</Text>
      ) : null}
      <TouchableOpacity testID="login-button" onPress={handleLogin}>
        <Text>Log In</Text>
      </TouchableOpacity>
      <TouchableOpacity
        testID="forgot-password-link"
        onPress={() => navigation.navigate('ForgotPassword')}
      >
        <Text>Forgot Password?</Text>
      </TouchableOpacity>
    </View>
  );
}
Advanced Detox Patterns
Testing complex interactions requires more sophisticated approaches:
// e2e/checkout.test.js
describe('Checkout Flow', () => {
  beforeAll(async () => {
    await device.launchApp({ newInstance: true });
    // Login before running checkout tests
    await loginAsTestUser();
  });

  it('should complete purchase with saved card', async () => {
    // Navigate to a product
    await element(by.id('product-list')).scroll(200, 'down');
    await element(by.id('product-item-123')).tap();

    // Add to cart
    await element(by.id('add-to-cart-button')).tap();
    await expect(element(by.id('cart-badge'))).toHaveText('1');

    // Proceed to checkout
    await element(by.id('view-cart-button')).tap();
    await element(by.id('checkout-button')).tap();

    // Select saved payment method
    await element(by.id('saved-card-visa-4242')).tap();
    await element(by.id('pay-now-button')).tap();

    // Verify order confirmation
    await waitFor(element(by.id('order-confirmation-screen')))
      .toBeVisible()
      .withTimeout(10000);

    await expect(element(by.id('order-number'))).toBeVisible();
  });

  it('should handle network failure during payment', async () => {
    // Add item and proceed to checkout
    await element(by.id('product-item-456')).tap();
    await element(by.id('add-to-cart-button')).tap();
    await element(by.id('view-cart-button')).tap();
    await element(by.id('checkout-button')).tap();

    // Simulate network failure before payment
    await device.setURLBlacklist(['.*api.stripe.com.*']);

    await element(by.id('saved-card-visa-4242')).tap();
    await element(by.id('pay-now-button')).tap();

    // Verify error handling
    await expect(element(by.text('Payment failed. Please try again.'))).toBeVisible();

    // Restore network
    await device.setURLBlacklist([]);
  });
});

async function loginAsTestUser() {
  await element(by.id('email-input')).typeText('[email protected]');
  await element(by.id('password-input')).typeText('testpassword123');
  await element(by.id('login-button')).tap();
  await waitFor(element(by.id('home-screen'))).toBeVisible().withTimeout(5000);
}
Unders
 tanding Maestro
Maestro is a mobile UI testing framework that takes a different approach. Created by mobile.dev, it uses a YAML-based syntax that makes tests readable and maintainable without deep programming knowledge.
Why Maestro Appeals to Teams
Maestro’s declarative YAML syntax is its standout feature. Product managers and QA engineers can write and understand tests without JavaScript knowledge. This democratises testing across the team.
Maestro also works with any mobile framework, not just React Native. Native iOS (Swift/SwiftUI), native Android (Kotlin/Compose), Flutter, and React Native apps all work equally well.
Setting Up Maestro
Install Maestro with a single command:
# macOS/Linux
curl -Ls "https://get.maestro.mobile.dev" | bash

# Verify installation
maestro --version
No project configuration is required. Maestro uses the app directly from your device or simulator.
Writing Maestro Tests
Create test files in a maestro folder at your project root:
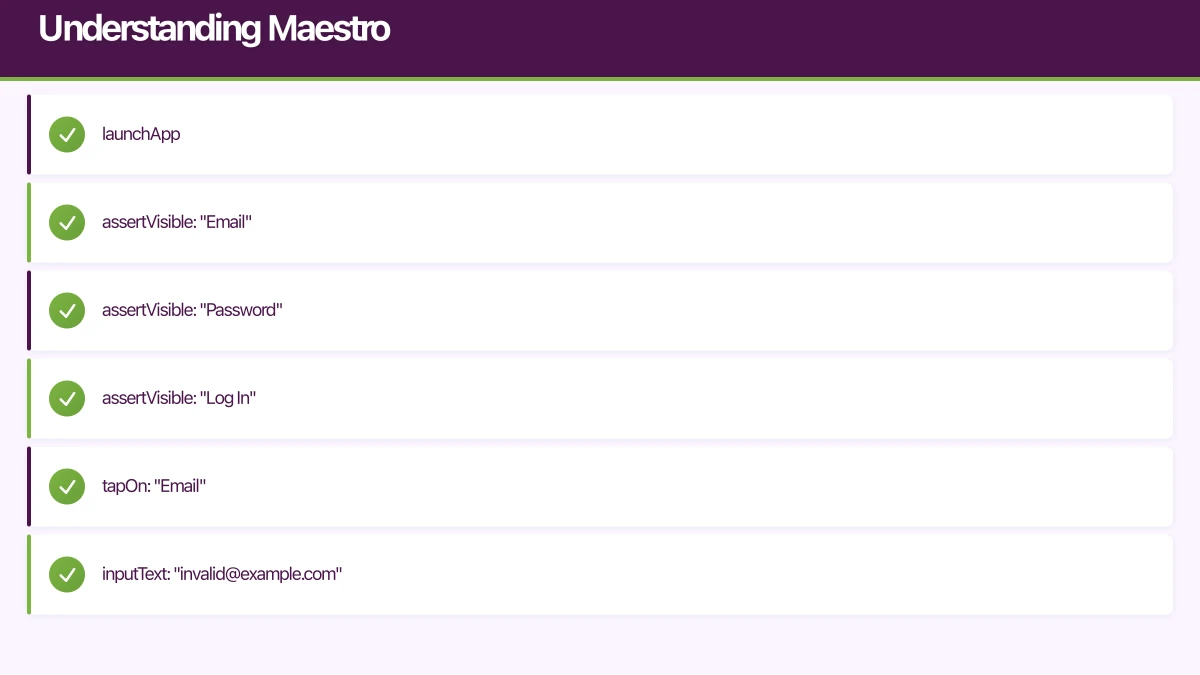
# maestro/login-flow.yaml
appId: com.yourcompany.yourapp
---
- launchApp

# Verify login screen elements
- assertVisible: "Email"
- assertVisible: "Password"
- assertVisible: "Log In"

# Test invalid login
- tapOn: "Email"
- inputText: "[email protected]"
- tapOn: "Password"
- inputText: "wrongpassword"
- tapOn: "Log In"
- assertVisible: "Invalid email or password"

# Clear and test valid login
- clearState
- launchApp
- tapOn: "Email"
- inputText: "[email protected]"
- tapOn: "Password"
- inputText: "correctpassword"
- tapOn: "Log In"
- assertVisible: "Welcome"
Run your test:
maestro test maestro/login-flow.yamlAdvanced Maestro Features
Maestro supports variables, conditionals, and reusable flows:
# maestro/config/test-users.yaml
TEST_USER_EMAIL: [email protected]
TEST_USER_PASSWORD: correctpassword123
# maestro/flows/login.yaml
appId: com.yourcompany.yourapp
---
- tapOn: "Email"
- inputText: ${TEST_USER_EMAIL}
- tapOn: "Password"
- inputText: ${TEST_USER_PASSWORD}
- tapOn: "Log In"
- assertVisible: "Welcome"# maestro/checkout-flow.yaml
appId: com.yourcompany.yourapp
env:
TEST_USER_EMAIL: [email protected]
TEST_USER_PASSWORD: correctpassword123
---
- launchApp
# Include login flow
- runFlow: flows/login.yaml
# Navigate to products
- tapOn: "Shop"
- scrollUntilVisible:
element: "Premium Headphones"
direction: DOWN
- tapOn: "Premium Headphones"
# Add to cart
- tapOn: "Add to Cart"
- assertVisible: "Added to cart"
# Proceed to checkout
- tapOn: "Cart"
- assertVisible: "Premium Headphones"
- assertVisible: "$299.00"
- tapOn: "Checkout"
# Complete payment
- tapOn: "Pay with saved card"
- tapOn: "Confirm Payment"
# Verify success
- assertVisible: "Order Confirmed"
- takeScreenshot: order-confirmationHandling Complex Interactions in Maestro
# maestro/media-upload.yaml
appId: com.yourcompany.yourapp
---
- launchApp
- runFlow: flows/login.yaml

# Navigate to profile
- tapOn: "Profile"
- tapOn: "Edit Profile"

# Test photo upload
- tapOn: "Change Photo"
- tapOn: "Choose from Library"
# Maestro can interact with system dialogs
- tapOn: "Allow Access"
- tapOn:
    index: 0 # Select first photo

# Wait for upload
- assertVisible:
    text: "Photo updated"
    timeout: 10000

# Verify change persisted
- tapOn: "Save"
- assertVisible: "Profile saved"

# Re-open profile to verify
- tapOn: "Profile"
- assertVisible: "Edit Profile" # Confirms we're on profile screen
Detox vs Maestro: Making the Choice
Both tools are excellent, but they serve different needs.
Choose Detox When
You are building with React Native: Detox’s deep integration with React Native provides synchronisation that eliminates flaky tests.
You need programmatic flexibility: Complex test logic, custom assertions, and integration with existing JavaScript tooling.
CI/CD integration is critical: Detox integrates seamlessly with Jest, which works with most CI systems.
Your team is comfortable with JavaScript: Detox tests are JavaScript, so developer buy-in is higher.
Choose Maestro When
Cross-platform native apps: Maestro works equally well with Swift, Kotlin, Flutter, and React Native.
Non-developers will write tests: YAML syntax is accessible to QA engineers and product managers.
Rapid test development: Maestro’s interactive mode lets you record tests by performing actions.
You prioritise simplicity: No project configuration, no build step, just write YAML and run.
Using Both Tools
Many teams use both. Detox for complex flows requiring programmatic control, Maestro for smoke tests and flows that non-developers maintain:
/e2e
  /detox           # Complex integration tests
    login.test.js
    checkout.test.js
    payments.test.js
  /maestro         # Smoke tests and simple flows
    smoke-test.yaml
    onboarding.yaml
    settings.yaml
Test Strategy Best Practices
Structure Your Test Pyramid
Not every test needs to be an end-to-end test. Follow the testing pyramid:
Unit tests (70%): Fast, isolated tests for business logic. Use Jest for JavaScript/TypeScript.
Integration tests (20%): Test component interactions. Use React Native Testing Library.
End-to-end tests (10%): Full user journeys with Detox or Maestro. Focus on critical paths.
Identify Critical Paths
Not every feature needs E2E coverage. Focus on:
- Authentication flows: Login, registration, password reset
- Revenue-generating flows: Checkout, subscription, payments
- Core value proposition: The main feature users come for
- Onboarding: First-time user experience
Handle Test Data
Tests need consistent, isolated data:
// e2e/utils/testData.js
export const testUsers = {
  standard: {
    email: '[email protected]',
    password: 'TestPassword123!'
  },
  premium: {
    email: '[email protected]',
    password: 'TestPassword123!'
  }
};

export async function seedTestData() {
  // Call your API to set up test data
  await fetch('https://api.yourapp.com/test/seed', {
    method: 'POST',
    headers: {
      'Authorization': `Bearer ${process.env.TEST_API_KEY}`
    }
  });
}

export async function cleanupTestData() {
  await fetch('https://api.yourapp.com/test/cleanup', {
    method: 'POST',
    headers: {
      'Authorization': `Bearer ${process.env.TEST_API_KEY}`
    }
  });
}
CI/CD Integration
Run tests automatically on every pull request:
# .github/workflows/e2e-tests.yml
name: E2E Tests

on:
  pull_request:
    branches: [main, develop]

jobs:
  detox-ios:
    runs-on: macos-14
    steps:
      - uses: actions/checkout@v4

      - name: Setup Node.js
        uses: actions/setup-node@v4
        with:
          node-version: '20'
          cache: 'npm'

      - name: Install dependencies
        run: npm ci

      - name: Install Detox CLI
        run: npm install -g detox-cli

      - name: Install pods
        run: cd ios && pod install

      - name: Build app for testing
        run: detox build --configuration ios.sim.release

      - name: Run Detox tests
        run: detox test --configuration ios.sim.release --cleanup

      - name: Upload test artifacts
        if: failure()
        uses: actions/upload-artifact@v4
        with:
          name: detox-artifacts
          path: artifacts/

  maestro-smoke:
    runs-on: macos-14
    steps:
      - uses: actions/checkout@v4

      - name: Install Maestro
        run: curl -Ls "https://get.maestro.mobile.dev" | bash

      - name: Setup Node.js
        uses: actions/setup-node@v4
        with:
          node-version: '20'
          cache: 'npm'

      - name: Install dependencies
        run: npm ci

      - name: Build iOS app
        run: |
          cd ios
          xcodebuild -workspace YourApp.xcworkspace \
            -scheme YourApp \
            -configuration Release \
            -sdk iphonesimulator \
            -derivedDataPath build

      - name: Boot simulator
        run: |
          xcrun simctl boot "iPhone 15 Pro"

      - name: Install app on simulator
        run: |
          xcrun simctl install booted ios/build/Build/Products/Release-iphonesimulator/YourApp.app

      - name: Run Maestro smoke tests
        run: ~/.maestro/bin/maestro test maestro/smoke-test.yaml
Debugging Failed Tests
Detox Debugging
Enable verbose logging when tests fail:
# Run with debug logging
detox test --configuration ios.sim.debug --loglevel trace

# Record video of test run
detox test --configuration ios.sim.debug --record-videos failing
Take screenshots on failure:
// e2e/utils/testHelpers.js
export async function takeScreenshotOnFailure(testName) {
  try {
    await device.takeScreenshot(testName);
  } catch (error) {
    console.error('Failed to take screenshot:', error);
  }
}

// In your test
afterEach(async function() {
  if (this.currentTest.state === 'failed') {
    await takeScreenshotOnFailure(this.currentTest.title);
  }
});
Maestro Debugging
Use Maestro Studio for interactive debugging:
# Launch interactive mode
maestro studio

# Record a test by performing actions in the app
maestro record maestro/new-flow.yaml
View test execution in real-time:
# Run with verbose output
maestro test --debug-output maestro/checkout.yaml
Performance Considerations
End-to-end tests are slower than unit tests. Optimise execution time:
Parallelise test execution: Run iOS and Android tests simultaneously in CI.
Use release builds: Debug builds are significantly slower.
Minimise app state resets: Group related tests that can share state.
Skip animations in tests: Disable animations to speed up execution.
// Disable animations for Detox tests
// In your app's entry point
if (typeof process.env.DETOX_TESTING !== 'undefined') {
  // Disable layout animations
  LayoutAnimation.configureNext = () => {};
  // Disable Animated animations
  jest.mock('react-native/Libraries/Animated/NativeAnimatedHelper');
}
Conclusion
Testing automation is not optional for teams shipping quality mobile apps in 2026. The tools have matured to the point where setup is straightforward and the benefits are immediate.
Detox provides deep React Native integration with programmatic power. Maestro offers simplicity and accessibility for diverse teams. Many organisations use both to cover different testing needs.
Start with your critical paths. Get those automated first, then expand coverage incrementally. The goal is not 100% coverage but confidence in your most important functionality.
Your future self, responding to production issues at 2 AM, will thank you for investing in automation today.
Building a mobile app that needs reliable testing automation? Our team has implemented testing strategies for apps serving millions of users. Contact us to discuss your testing needs.
Need a web version of your mobile app? Cosmos Web Tech builds responsive web apps and PWAs for Australian businesses.
Awesome Apps operates under the Ganda Tech Services umbrella, delivering end-to-end technology solutions for Australian businesses.
Talk to a Sydney app developer — free.
30 minutes. We'll tell you what your app needs, how long it takes, and what it costs. Real answers, no sales pitch.
Book Free App Strategy Call →Free · 30 minutes · No obligation