React Native Performance Optimisation Deep Dive
React Native has matured significantly, and in 2022 it powers production apps at scale for companies like Shopify, Discord, and Coinbase. But performance does not come automatically. Without deliberate optimisation, React Native apps can feel sluggish compared to their native counterparts.
This guide covers the performance techniques that make the biggest practical difference, based on our experience building React Native apps for Australian businesses.
Understanding the Architecture
Before optimising, you need to understand how React Native works under the hood.
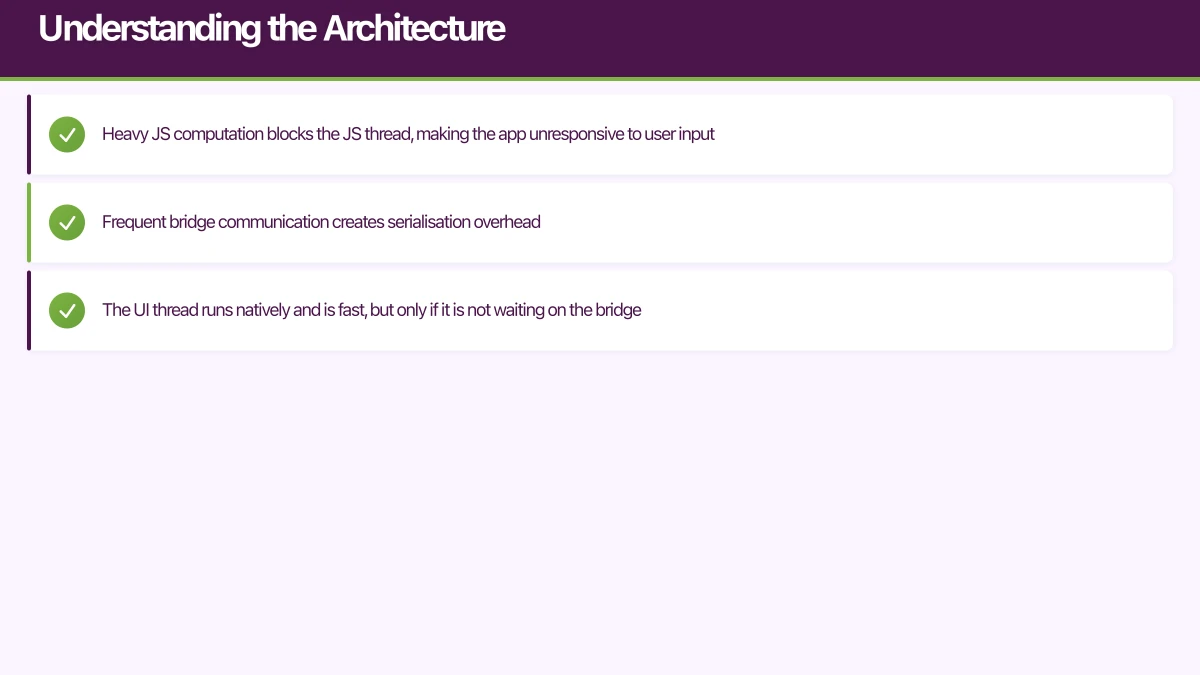
React Native runs your JavaScript code on a separate thread from the UI thread. Communication between these two threads happens over the Bridge, a serialised message queue. Every time your JS code needs to update the UI, or the UI needs to notify your JS code of an event, data is serialised, sent across the bridge, and deserialised on the other side.
This architecture means:
- Heavy JS computation blocks the JS thread, making the app unresponsive to user input
- Frequent bridge communication creates serialisation overhead
- The UI thread runs natively and is fast, but only if it is not waiting on the bridge
Most React Native performance issues stem from either blocking the JS thread or flooding the bridge with messages.
Rendering Opti
misation
Prevent Unnecessary Re-renders
The single most impactful optimisation is preventing unnecessary re-renders. React re-renders a component whenever its parent re-renders, even if the component’s own props have not changed.
// Problem: UserAvatar re-renders every time the parent re-renders
const UserList = ({ users, onRefresh }) => {
  return (
    <FlatList
      data={users}
      renderItem={({ item }) => (
        <View style={styles.row}>
          <UserAvatar user={item} />
          <Text>{item.name}</Text>
        </View>
      )}
    />
  );
};

// Solution: Memoize the row component
const UserRow = React.memo(({ user }) => {
  return (
    <View style={styles.row}>
      <UserAvatar user={user} />
      <Text>{user.name}</Text>
    </View>
  );
});

const UserList = ({ users, onRefresh }) => {
  const renderItem = useCallback(
    ({ item }) => <UserRow user={item} />,
    []
  );

  return (
    <FlatList
      data={users}
      renderItem={renderItem}
      keyExtractor={keyExtractor}
    />
  );
};

const keyExtractor = (item) => item.id;
useMemo and useCallback
Use useMemo for expensive computations and useCallback for function references passed as props:
const SearchResults = ({ items, searchQuery }) => {
  // Memoize expensive filtering
  const filteredItems = useMemo(() => {
    return items.filter(item =>
      item.name.toLowerCase().includes(searchQuery.toLowerCase())
    );
  }, [items, searchQuery]);

  // Memoize callbacks passed to children
  const handlePress = useCallback((item) => {
    navigation.navigate('Detail', { id: item.id });
  }, [navigation]);

  return (
    <FlatList
      data={filteredItems}
      renderItem={({ item }) => (
        <SearchResultRow item={item} onPress={handlePress} />
      )}
    />
  );
};
Avoid Inline Objects and Functions
Inline objects and functions create new references on every render, defeating React.memo:
// Bad: new style object every render
<View style={{ padding: 16, backgroundColor: '#fff' }}>

// Good: static styles outside the component
const styles = StyleSheet.create({
  container: { padding: 16, backgroundColor: '#fff' },
});
<View style={styles.container}>

// Bad: new function every render
<TouchableOpacity onPress={() => handlePress(item.id)}>

// Good: memoized or extracted handler
const handlePress = useCallback(() => {
  onItemPress(item.id);
}, [item.id, onItemPress]);
<TouchableOpacity onPress={handlePress}>
FlatList Opti
misation
FlatList is the workhorse component for lists in React Native, and it is where many performance problems surface.
Essential FlatList Props
<FlatList
  data={items}
  renderItem={renderItem}
  keyExtractor={keyExtractor}

  // Performance props
  removeClippedSubviews={true}        // Unmount off-screen items
  maxToRenderPerBatch={10}             // Items rendered per batch
  updateCellsBatchingPeriod={50}       // Time between batch renders (ms)
  initialNumToRender={10}              // Items rendered on first load
  windowSize={5}                       // Number of viewports to keep rendered
  getItemLayout={getItemLayout}        // Skip layout measurement

  // Only if items have fixed height
  getItemLayout={(data, index) => ({
    length: ITEM_HEIGHT,
    offset: ITEM_HEIGHT * index,
    index,
  })}
/>
getItemLayout
If your list items have a consistent height, providing getItemLayout eliminates the need for React Native to measure each item, significantly improving scroll performance and enabling instant scroll-to-index:
const ITEM_HEIGHT = 72;
const SEPARATOR_HEIGHT = 1;

const getItemLayout = (data, index) => ({
  length: ITEM_HEIGHT,
  offset: (ITEM_HEIGHT + SEPARATOR_HEIGHT) * index,
  index,
});
Virtualization Tuning
The windowSize prop controls how many screens worth of content are rendered above and below the visible area. The default is 21 (10 screens above, the visible screen, and 10 below). For most apps, reducing this to 5 saves significant memory:
<FlatList
  windowSize={5}     // 2 screens above + visible + 2 below
  maxToRenderPerBatch={5}
/>
Image Opti
misation
Images are often the largest performance bottleneck in mobile apps.
Use FastImage
The built-in Image component has known performance issues, particularly with caching. Use react-native-fast-image instead:
import FastImage from 'react-native-fast-image';

const ProductImage = ({ uri }) => (
  <FastImage
    style={styles.image}
    source={{
      uri,
      priority: FastImage.priority.normal,
      cache: FastImage.cacheControl.immutable,
    }}
    resizeMode={FastImage.resizeMode.cover}
  />
);
Resize on the Server
Never download a 4000x3000 pixel image to display in a 200x200 container. Use server-side image resizing or a CDN with transformation capabilities:
const getOptimisedImageUrl = (url, width, height) => {
  // Example with Cloudinary
  return url.replace(
    '/upload/',
    `/upload/w_${width},h_${height},c_fill,q_auto,f_auto/`
  );
};

<FastImage
  source={{ uri: getOptimisedImageUrl(imageUrl, 400, 400) }}
  style={{ width: 200, height: 200 }}
/>
Preload Critical Images
For images that appear immediately on screen, preload them:
useEffect(() => {
  FastImage.preload([
    { uri: heroImageUrl },
    { uri: userAvatarUrl },
  ]);
}, [heroImageUrl, userAvatarUrl]);
Navigation Performance
React Navigation Optimisation
React Navigation is the standard navigation library for React Native. Key optimisations:
// Lazy load screens
const ProfileScreen = React.lazy(() => import('./screens/ProfileScreen'));

// Or use React Navigation's built-in lazy loading
<Stack.Screen
  name="Profile"
  getComponent={() => require('./screens/ProfileScreen').default}
/>

// Freeze inactive screens to prevent re-renders
import { enableFreeze } from 'react-native-screens';
enableFreeze(true);
Avoid Heavy Screen Transitions
Screen transitions should feel instant. If a screen takes time to render, show a placeholder and load content asynchronously:
const HeavyScreen = () => {
  const [isReady, setIsReady] = useState(false);

  useEffect(() => {
    // Wait for transition to complete before rendering heavy content
    const timeout = setTimeout(() => setIsReady(true), 100);
    return () => clearTimeout(timeout);
  }, []);

  if (!isReady) {
    return <ScreenPlaceholder />;
  }

  return <HeavyContent />;
};
Bridge Communication
Minimise Bridge Traffic
Every cross-bridge call has overhead. Batch operations where possible:
// Bad: Multiple individual bridge calls
items.forEach(item => {
  NativeModule.processItem(item);
});

// Better: Single batch call
NativeModule.processItems(items);
Use Hermes Engine
Hermes is a JavaScript engine optimised for React Native. It improves startup time, reduces memory usage, and decreases app size. Enable it in your build configuration:
// android/app/build.gradle
project.ext.react = [
    enableHermes: true
]
For iOS, Hermes is available starting from React Native 0.64:
# Podfile
use_react_native!(
  :hermes_enabled => true
)
Hermes typically reduces:
- App startup time by 30 to 50 percent
- Memory usage by 20 to 30 percent
- Download size by several megabytes
Memory Management
Monitor Memory Usage
Use Flipper or the React Native performance monitor to track memory:
// Enable the performance monitor in development
if (__DEV__) {
  // Shake device or Cmd+D to access dev menu
  // Enable "Show Perf Monitor"
}
Common Memory Leaks
Uncleared subscriptions and listeners:
useEffect(() => {
  const subscription = eventEmitter.addListener('event', handler);

  // Always clean up
  return () => subscription.remove();
}, []);
Retained closures:
// Problem: the entire component scope is retained
useEffect(() => {
  const interval = setInterval(() => {
    // This closure retains references to everything in scope
    fetchData();
  }, 5000);

  return () => clearInterval(interval);
}, []);
Image cache growth:
// Periodically clear the image cache
FastImage.clearMemoryCache();
// Only clear disk cache when necessary (e.g., on logout)
FastImage.clearDiskCache();
Startup Time Optimisation
Reduce Bundle Size
Analyse your JavaScript bundle to find large dependencies:
npx react-native-bundle-visualizerReplace large libraries with smaller alternatives where possible. For example, use date-fns instead of moment.js (moment adds roughly 300KB to your bundle).
Defer Non-Critical Work
Do not initialise everything at startup. Defer analytics, background sync, and non-visible features:
const App = () => {
  useEffect(() => {
    // Defer non-critical initialisation
    InteractionManager.runAfterInteractions(() => {
      initAnalytics();
      setupBackgroundSync();
      prefetchData();
    });
  }, []);

  return <AppNavigator />;
};
Inline Requires
For large modules, use inline requires to defer loading until the module is actually needed:
// Instead of top-level import
// import HeavyModule from './HeavyModule';

// Use inline require
const getHeavyModule = () => require('./HeavyModule').default;

// Only loaded when called
const handlePress = () => {
  const HeavyModule = getHeavyModule();
  HeavyModule.doSomething();
};
Measuring Performance
You cannot optimise what you do not measure. Use these tools:
- Flipper: Meta’s desktop debugging tool with React Native plugins for performance profiling
- React DevTools Profiler: Identifies unnecessary re-renders
- Systrace (Android): Low-level performance tracing
- Instruments (iOS): Apple’s profiling tools work with React Native apps
- react-native-performance: Library for measuring component render times
Track these metrics in production:
- Time to Interactive (TTI)
- Frame rate during scrolling (target: 60fps)
- JS thread frame drops
- Memory usage over time
Conclusion
React Native performance is not magic. It is the result of understanding the framework’s architecture and applying targeted optimisations. Start with rendering (prevent unnecessary re-renders), move to lists (optimise FlatList), then address images, navigation, and startup time.
The techniques in this guide can transform a sluggish React Native app into one that feels native. The key is measuring before and after each change to ensure your optimisations have the intended effect.
If your React Native app needs a performance overhaul, get in touch with eawesome. We help Australian businesses build React Native apps that perform on par with native applications.
Scaling your app’s backend? Cloud Geeks specialises in cloud infrastructure that grows with your user base across Australia.
This article is brought to you by Ganda Tech Services — Sydney’s complete digital solutions provider covering cloud, web, and mobile.
Talk to a Sydney app developer — free.
30 minutes. We'll tell you what your app needs, how long it takes, and what it costs. Real answers, no sales pitch.
Book Free App Strategy Call →Free · 30 minutes · No obligation