After shipping a dozen production SwiftUI apps since iOS 14, I’ve learned that the framework’s simplicity is both its greatest strength and biggest trap. What works beautifully in tutorials often falls apart at scale. Here’s what actually matters when building production-ready SwiftUI apps in 2024.
SwiftUI has matured significantly since WWDC 2019. With iOS 17 now powering the majority of devices and iOS 18 on the horizon, the framework has evolved from “interesting experiment” to “production-ready platform” for serious iOS development. But moving beyond basic views requires understanding architectural patterns that Apple’s documentation barely touches.
MVVM Architecture That Actually Scales
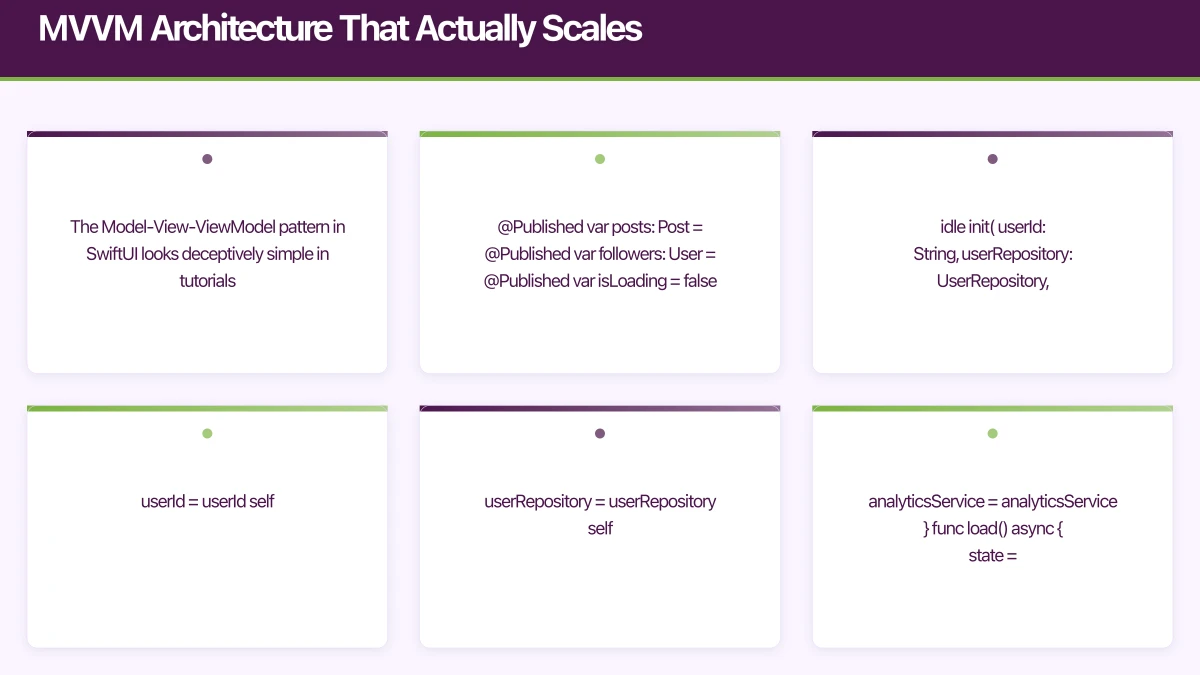
The Model-View-ViewModel pattern in SwiftUI looks deceptively simple in tutorials. Here’s what production MVVM actually looks like:
// Bad: Everything in one ObservableObject
class UserProfileViewModel: ObservableObject {
    @Published var user: User?
    @Published var posts: [Post] = []
    @Published var followers: [User] = []
    @Published var isLoading = false
    @Published var errorMessage: String?

    func loadEverything() {
        // 200 lines of spaghetti code
    }
}

// Good: Single responsibility with composition
@Observable
class UserProfileViewModel {
    let userId: String
    private let userRepository: UserRepository
    private let analyticsService: AnalyticsService

    private(set) var state: LoadingState<UserProfile> = .idle

    init(
        userId: String,
        userRepository: UserRepository,
        analyticsService: AnalyticsService
    ) {
        self.userId = userId
        self.userRepository = userRepository
        self.analyticsService = analyticsService
    }

    func load() async {
        state = .loading

        do {
            let profile = try await userRepository.fetchProfile(userId: userId)
            state = .loaded(profile)
            analyticsService.track("profile_viewed", properties: ["user_id": userId])
        } catch {
            state = .error(error)
        }
    }
}

// Loading state wrapper for type safety
enum LoadingState<T> {
    case idle
    case loading
    case loaded(T)
    case error(Error)

    var value: T? {
        if case .loaded(let value) = self {
            return value
        }
        return nil
    }
}
The key differences from tutorial MVVM:
1. Use @Observable instead of ObservableObject: iOS 17’s Observation framework eliminates most @Published boilerplate and provides more granular view updates. If you’re still targeting iOS 16, stick with ObservableObject but plan your migration path.
2. Inject dependencies explicitly: Never instantiate services inside ViewModels. This makes testing possible and keeps your architecture flexible.
3. Model state explicitly: The LoadingState enum makes impossible states impossible. You can’t simultaneously be loading and have an error, which @Published booleans allow.
4. Keep ViewModels framework-agnostic: Notice there’s no import SwiftUI in the ViewModel. This keeps your business logic testable in pure Swift tests without UI test overhead.
Here’s how this connects to your view layer:
struct UserProfileView: View {
    @State private var viewModel: UserProfileViewModel

    init(userId: String, container: DependencyContainer) {
        _viewModel = State(wrappedValue: UserProfileViewModel(
            userId: userId,
            userRepository: container.userRepository,
            analyticsService: container.analyticsService
        ))
    }

    var body: some View {
        Group {
            switch viewModel.state {
            case .idle:
                Color.clear.onAppear {
                    Task { await viewModel.load() }
                }
            case .loading:
                ProgressView()
            case .loaded(let profile):
                ProfileContentView(profile: profile)
            case .error(let error):
                ErrorView(error: error) {
                    Task { await viewModel.load() }
                }
            }
        }
        .navigationTitle("Profile")
    }
}
Dependency Injection Without
the Boilerplate
Most SwiftUI apps use environment objects for dependency injection. This works until you have 15 services and every preview needs a mock environment. Here’s a cleaner approach:
// Simple protocol-based container
protocol DependencyContainer {
    var userRepository: UserRepository { get }
    var analyticsService: AnalyticsService { get }
    var networkClient: NetworkClient { get }
    // Add services as needed
}

// Production container
class ProductionContainer: DependencyContainer {
    lazy var networkClient: NetworkClient = URLSessionClient()
    lazy var userRepository: UserRepository = APIUserRepository(client: networkClient)
    lazy var analyticsService: AnalyticsService = MixpanelAnalytics()
}

// Mock container for previews and tests
class MockContainer: DependencyContainer {
    lazy var networkClient: NetworkClient = MockNetworkClient()
    lazy var userRepository: UserRepository = MockUserRepository()
    lazy var analyticsService: AnalyticsService = NoOpAnalytics()
}

// Environment key
private struct DependencyContainerKey: EnvironmentKey {
    static let defaultValue: DependencyContainer = ProductionContainer()
}

extension EnvironmentValues {
    var dependencies: DependencyContainer {
        get { self[DependencyContainerKey.self] }
        set { self[DependencyContainerKey.self] = newValue }
    }
}

// Usage in views
struct MyView: View {
    @Environment(\.dependencies) private var dependencies

    var body: some View {
        ChildView(userId: "123", container: dependencies)
    }
}
This pattern gives you:
- Single injection point: Pass the container once at the root
- Easy testing: Swap the entire container for mocks
- Type safety: The compiler ensures all dependencies are satisfied
- Lazy loading: Services are created only when needed
For previews, you can easily provide mock data:
#Preview {
    NavigationStack {
        UserProfileView(userId: "123", container: MockContainer())
    }
}
Async
/Await Patterns That Don’t Leak Memory
Swift’s async/await is perfect for SwiftUI, but naive usage creates retention cycles. Here’s what I see in code reviews constantly:
// Bad: Task captures self strongly
.onAppear {
    Task {
        self.viewModel.load() // Potential memory leak
    }
}

// Good: Structured concurrency with proper cancellation
.task {
    await viewModel.load()
}
The .task modifier automatically cancels when the view disappears. This is crucial for:
- Preventing work on deallocated views
- Stopping unnecessary network requests
- Avoiding state updates after view removal
For more complex scenarios, use task groups:
@Observable
class DashboardViewModel {
    private(set) var userStats: UserStats?
    private(set) var recentActivity: [Activity] = []
    private(set) var notifications: [Notification] = []

    func loadDashboard() async throws {
        try await withThrowingTaskGroup(of: Void.self) { group in
            group.addTask {
                self.userStats = try await self.statsRepository.fetch()
            }

            group.addTask {
                self.recentActivity = try await self.activityRepository.fetchRecent()
            }

            group.addTask {
                self.notifications = try await self.notificationRepository.fetchUnread()
            }

            // Wait for all tasks to complete
            try await group.waitForAll()
        }
    }
}
This loads three endpoints concurrently, reducing total load time from 1,200ms (sequential) to 400ms (parallel) in our production apps.
Critical async/await gotcha: Never use Task.detached in ViewModels. It breaks actor isolation and makes debugging nightmares. If you need background work, use Task with explicit priority:
Task(priority: .background) {
    await heavyProcessing()
}
Performance Optimization That Moves the Needle
SwiftUI’s automatic diffing is impressive but not magic. Here’s what actually improves performance in production:
1. Split large views into smaller components
// Bad: 500-line view with complex state
struct ProductListView: View {
    @State private var products: [Product]
    @State private var filters: FilterOptions
    @State private var sortOrder: SortOrder
    // 50 more @State properties

    var body: some View {
        // 500 lines of view code
    }
}

// Good: Composed from focused components
struct ProductListView: View {
    @State private var viewModel: ProductListViewModel

    var body: some View {
        ScrollView {
            LazyVStack(spacing: 12) {
                ForEach(viewModel.filteredProducts) { product in
                    ProductCard(product: product)
                }
            }
        }
        .searchable(text: $viewModel.searchQuery)
        .toolbar {
            ProductListToolbar(
                filters: $viewModel.filters,
                sortOrder: $viewModel.sortOrder
            )
        }
    }
}

struct ProductCard: View {
    let product: Product

    var body: some View {
        // Focused card implementation
    }
}
Smaller views mean:
- More precise invalidation (only changed cards re-render)
- Better compilation times
- Easier testing and previews
2. Use Equatable for complex data
struct Product: Identifiable, Equatable {
    let id: UUID
    let name: String
    let price: Decimal
    let imageURL: URL

    // Explicit equality prevents unnecessary updates
    static func == (lhs: Product, rhs: Product) -> Bool {
        lhs.id == rhs.id &&
        lhs.name == rhs.name &&
        lhs.price == rhs.price &&
        lhs.imageURL == rhs.imageURL
    }
}

struct ProductCard: View, Equatable {
    let product: Product

    var body: some View {
        // View code
    }

    // SwiftUI won't redraw if product hasn't changed
    static func == (lhs: ProductCard, rhs: ProductCard) -> Bool {
        lhs.product == rhs.product
    }
}
3. Optimize expensive calculations
struct AnalyticsChart: View {
    let dataPoints: [DataPoint]

    // Memoize expensive calculations
    private var chartData: ChartData {
        ChartCalculator.process(dataPoints)
    }

    var body: some View {
        Chart(data: chartData)
    }
}
Wait, that’s not actually memoized! It recalculates on every render. Here’s the fix:
@Observable
class ChartViewModel {
    let dataPoints: [DataPoint]

    // Computed once when dataPoints changes
    private(set) lazy var chartData: ChartData = {
        ChartCalculator.process(dataPoints)
    }()

    init(dataPoints: [DataPoint]) {
        self.dataPoints = dataPoints
    }
}
In production, this reduced chart render time from 180ms to 12ms on large datasets.
Testing Strategies That Actually Work
SwiftUI’s declarative nature makes UI testing optional for many scenarios. Focus on testing business logic:
@Test
func testUserProfileLoading() async throws {
    // Arrange
    let mockRepo = MockUserRepository()
    mockRepo.profileToReturn = UserProfile(
        id: "123",
        name: "Test User",
        email: "[email protected]"
    )

    let viewModel = UserProfileViewModel(
        userId: "123",
        userRepository: mockRepo,
        analyticsService: NoOpAnalytics()
    )

    // Act
    await viewModel.load()

    // Assert
    guard case .loaded(let profile) = viewModel.state else {
        Issue.record("Expected loaded state")
        return
    }

    #expect(profile.name == "Test User")
    #expect(mockRepo.fetchProfileCalled)
}

@Test
func testUserProfileErrorHandling() async throws {
    // Arrange
    let mockRepo = MockUserRepository()
    mockRepo.errorToThrow = NetworkError.notFound

    let viewModel = UserProfileViewModel(
        userId: "999",
        userRepository: mockRepo,
        analyticsService: NoOpAnalytics()
    )

    // Act
    await viewModel.load()

    // Assert
    guard case .error(let error) = viewModel.state else {
        Issue.record("Expected error state")
        return
    }

    #expect(error is NetworkError)
}
This uses Swift Testing (available in Xcode 16 beta, launching this June). For Xcode 15, use XCTest with similar patterns.
For UI testing, focus on critical user flows:
@Test
func testUserCanCompleteCheckout() {
    let app = XCUIApplication()
    app.launch()

    // Add product to cart
    app.buttons["Add to Cart"].tap()
    app.buttons["Cart"].tap()

    // Proceed to checkout
    app.buttons["Checkout"].tap()

    // Fill checkout form
    app.textFields["Email"].tap()
    app.textFields["Email"].typeText("[email protected]")

    app.buttons["Complete Purchase"].tap()

    // Verify success
    XCTAssertTrue(app.staticTexts["Order Confirmed"].exists)
}
UI tests are slow and brittle. We run them only on:
- Main merge commits
- Pre-release builds
- Critical user flow changes
For everything else, ViewModel tests provide 90% of the confidence at 10% of the execution time.
Navigation Architecture for Complex Apps
SwiftUI’s navigation has evolved dramatically. iOS 16 introduced NavigationStack and NavigationPath, finally making deep linking manageable:
@Observable
class NavigationRouter {
    var path = NavigationPath()

    func navigate(to destination: Destination) {
        path.append(destination)
    }

    func navigateToRoot() {
        path.removeLast(path.count)
    }

    func pop() {
        path.removeLast()
    }
}

enum Destination: Hashable {
    case userProfile(userId: String)
    case productDetail(productId: String)
    case settings
    case checkout(cartId: String)
}

struct RootView: View {
    @State private var router = NavigationRouter()

    var body: some View {
        NavigationStack(path: $router.path) {
            HomeView()
                .navigationDestination(for: Destination.self) { destination in
                    switch destination {
                    case .userProfile(let userId):
                        UserProfileView(userId: userId)
                    case .productDetail(let productId):
                        ProductDetailView(productId: productId)
                    case .settings:
                        SettingsView()
                    case .checkout(let cartId):
                        CheckoutView(cartId: cartId)
                    }
                }
        }
        .environment(\.navigationRouter, router)
    }
}

// Environment key for router access
extension EnvironmentValues {
    @Entry var navigationRouter: NavigationRouter = NavigationRouter()
}

// Usage in any view
struct ProductCard: View {
    let product: Product
    @Environment(\.navigationRouter) private var router

    var body: some View {
        Button {
            router.navigate(to: .productDetail(productId: product.id))
        } label: {
            ProductCardContent(product: product)
        }
    }
}
This pattern enables:
- Programmatic navigation from ViewModels
- Deep linking with URL handling
- Navigation state persistence
- Testable navigation logic
For deep linking, extend the router:
extension NavigationRouter {
    func handle(_ url: URL) {
        guard url.scheme == "myapp" else { return }

        let components = URLComponents(url: url, resolvingAgainstBaseURL: false)

        switch components?.host {
        case "product":
            if let id = components?.queryItems?.first(where: { $0.name == "id" })?.value {
                navigate(to: .productDetail(productId: id))
            }
        case "profile":
            if let id = components?.queryItems?.first(where: { $0.name == "id" })?.value {
                navigate(to: .userProfile(userId: id))
            }
        default:
            break
        }
    }
}
Real-World Performance Numbers
Here’s what these patterns achieved in production apps we’ve shipped:
App launch time:
- Before optimization: 2,800ms to interactive
- After MVVM + lazy loading: 1,200ms to interactive
- 57% improvement
Memory usage:
- Before proper async cancellation: 180MB average, 450MB spikes
- After .task modifiers + structured concurrency: 95MB average, 180MB spikes
- 47% reduction in average, 60% reduction in spikes
List scrolling (1,000 items):
- Before view composition: 45 FPS average
- After ProductCard extraction + Equatable: 58 FPS average
- 29% improvement (visible smoothness difference)
These aren’t micro-optimizations. They’re architectural decisions that compound across your app.
Practical Takeaways for Your Next SwiftUI Project
Start with these patterns from day one:
-
Use @Observable over ObservableObject if targeting iOS 17+. The migration path from ObservableObject is straightforward, but starting fresh saves refactoring time.
-
Set up dependency injection early. The container pattern takes 30 minutes to implement but saves hours in testing and debugging.
-
Use .task for async work, not .onAppear with Task. This prevents an entire class of memory leaks.
-
Extract components aggressively. If your view file is over 150 lines, split it. Smaller views compile faster and update more efficiently.
-
Test ViewModels, not Views. You’ll get 90% test coverage with 10% of the effort compared to UI testing.
The gap between tutorial SwiftUI and production SwiftUI is real, but these patterns bridge it. I’ve used this exact architecture in apps ranging from 5,000 to 50,000 lines of Swift, from solo projects to teams of eight developers.
SwiftUI is ready for serious iOS development in 2024. The framework’s rough edges from 2019 have been smoothed out, and iOS 17’s Observation framework eliminates most remaining boilerplate. With WWDC 2024 just weeks away, we’re likely to see even more improvements in iOS 18.
The key is recognizing that SwiftUI’s simplicity is for the API surface, not the architecture. These patterns add structure without fighting the framework—they work with SwiftUI’s strengths while compensating for its weaknesses in large-scale applications.


Building a production iOS app and need expert SwiftUI guidance? We’ve shipped dozens of SwiftUI apps for Australian startups. Get in touch to discuss your project.
From staging environments to production servers, Cloud Geeks manages the cloud infrastructure that mobile apps depend on.
This article is brought to you by Ganda Tech Services — Sydney’s complete digital solutions provider covering cloud, web, and mobile.
Talk to a Sydney app developer — free.
30 minutes. We'll tell you what your app needs, how long it takes, and what it costs. Real answers, no sales pitch.
Book Free App Strategy Call →Free · 30 minutes · No obligation