Implementing Biometric Authentication in Mobile Apps
Biometric authentication has become the expected way for users to secure their mobile apps. Face ID, Touch ID, and Android’s fingerprint and face recognition provide a seamless balance between security and convenience. For apps handling sensitive data, financial transactions, or personal information, biometric authentication is no longer a nice-to-have feature.
This guide covers the practical implementation of biometric authentication on iOS and Android, including security considerations, fallback strategies, and the common pitfalls we encounter in production apps.
Why Biometrics Matter
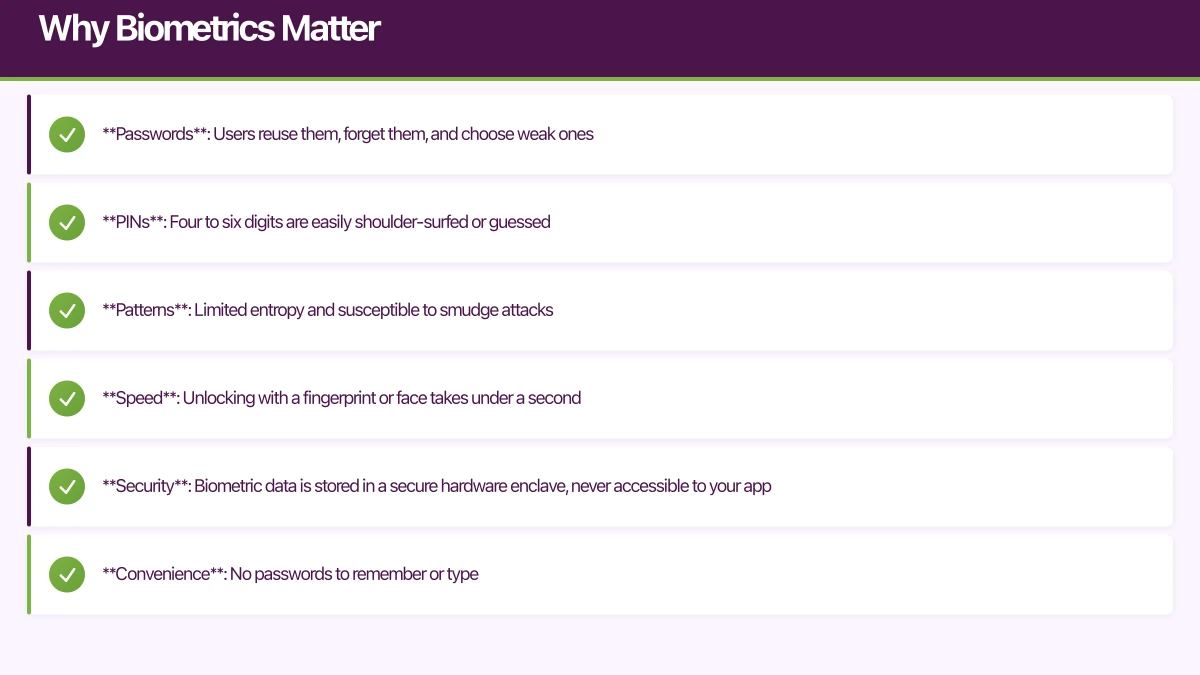
Traditional authentication methods have well-known problems:
- Passwords: Users reuse them, forget them, and choose weak ones
- PINs: Four to six digits are easily shoulder-surfed or guessed
- Patterns: Limited entropy and susceptible to smudge attacks
Biometrics solve these problems by using something the user inherently is, rather than something they know. The key benefits:
- Speed: Unlocking with a fingerprint or face takes under a second
- Security: Biometric data is stored in a secure hardware enclave, never accessible to your app
- Convenience: No passwords to remember or type
- User expectation: Banking apps, password managers, and payment apps have normalised biometric login
iOS: Face ID and Touch ID
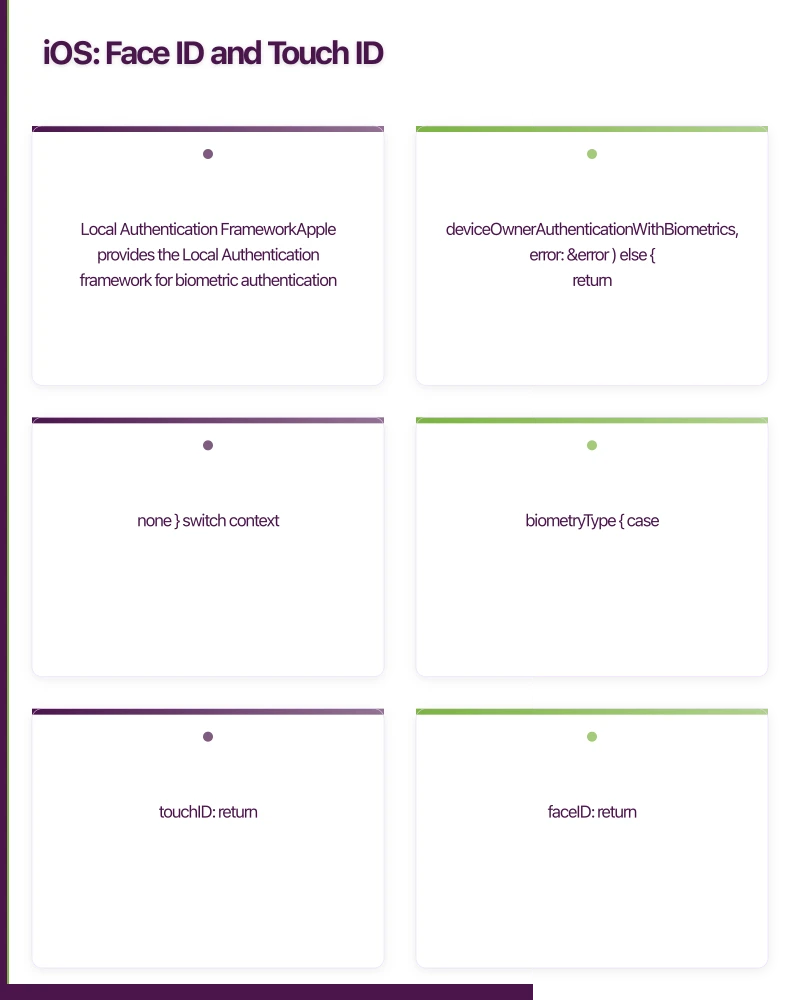
Local Authentication Framework
Apple provides the Local Authentication framework for biometric authentication. It abstracts the differences between Face ID and Touch ID behind a unified API:
import LocalAuthentication

class BiometricAuthManager {
    private let context = LAContext()

    enum BiometricType {
        case none
        case touchID
        case faceID
    }

    var availableBiometricType: BiometricType {
        var error: NSError?
        guard context.canEvaluatePolicy(
            .deviceOwnerAuthenticationWithBiometrics,
            error: &error
        ) else {
            return .none
        }

        switch context.biometryType {
        case .touchID:
            return .touchID
        case .faceID:
            return .faceID
        default:
            return .none
        }
    }

    func authenticate(
        reason: String,
        completion: @escaping (Result<Bool, Error>) -> Void
    ) {
        let context = LAContext()
        context.localizedCancelTitle = "Use Password"

        var error: NSError?
        guard context.canEvaluatePolicy(
            .deviceOwnerAuthenticationWithBiometrics,
            error: &error
        ) else {
            completion(.failure(error ?? BiometricError.notAvailable))
            return
        }

        context.evaluatePolicy(
            .deviceOwnerAuthenticationWithBiometrics,
            localizedReason: reason
        ) { success, error in
            DispatchQueue.main.async {
                if success {
                    completion(.success(true))
                } else if let error = error {
                    completion(.failure(error))
                }
            }
        }
    }
}
Info.plist Configuration
Face ID requires a usage description in your Info.plist:
<key>NSFaceIDUsageDescription</key>
<string>We use Face ID to securely log you into the app.</string>
Without this entry, your app will crash when attempting Face ID authentication. Touch ID does not require a separate usage description.
Keychain Integration
For secure credential storage alongside biometrics, use the Keychain with biometric access control:
import Security

class SecureCredentialStore {

    func saveCredential(
        _ credential: String,
        forKey key: String
    ) throws {
        let access = SecAccessControlCreateWithFlags(
            nil,
            kSecAttrAccessibleWhenUnlockedThisDeviceOnly,
            .biometryCurrentSet,
            nil
        )

        let query: [String: Any] = [
            kSecClass as String: kSecClassGenericPassword,
            kSecAttrAccount as String: key,
            kSecValueData as String: credential.data(using: .utf8)!,
            kSecAttrAccessControl as String: access as Any,
        ]

        // Delete any existing item
        SecItemDelete(query as CFDictionary)

        let status = SecItemAdd(query as CFDictionary, nil)
        guard status == errSecSuccess else {
            throw KeychainError.saveFailed(status)
        }
    }

    func loadCredential(
        forKey key: String,
        reason: String
    ) throws -> String? {
        let context = LAContext()
        context.localizedReason = reason

        let query: [String: Any] = [
            kSecClass as String: kSecClassGenericPassword,
            kSecAttrAccount as String: key,
            kSecReturnData as String: true,
            kSecUseAuthenticationContext as String: context,
        ]

        var result: AnyObject?
        let status = SecItemCopyMatching(query as CFDictionary, &result)

        guard status == errSecSuccess,
              let data = result as? Data,
              let credential = String(data: data, encoding: .utf8)
        else {
            if status == errSecItemNotFound {
                return nil
            }
            throw KeychainError.loadFailed(status)
        }

        return credential
    }
}
The .biometryCurrentSet flag means the keychain item is invalidated if the user adds or removes a fingerprint or Face ID profile. This is a security feature: if someone adds their own biometric data to the device, they cannot access previously stored credentials.
Handling Face ID and Touch ID Errors
func handleAuthError(_ error: Error) {
guard let laError = error as? LAError else {
showGenericError()
return
}
switch laError.code {
case .biometryNotEnrolled:
// No biometric data registered
showMessage("Please set up Face ID or Touch ID in Settings.")
case .biometryNotAvailable:
// Hardware not available
showMessage("Biometric authentication is not available on this device.")
case .biometryLockout:
// Too many failed attempts
showMessage("Biometric authentication is locked. Please use your passcode.")
case .userCancel:
// User tapped cancel
break
case .userFallback:
// User tapped "Use Password"
showPasswordLogin()
case .authenticationFailed:
// Biometric did not match
showMessage("Authentication failed. Please try again.")
default:
showGenericError()
}
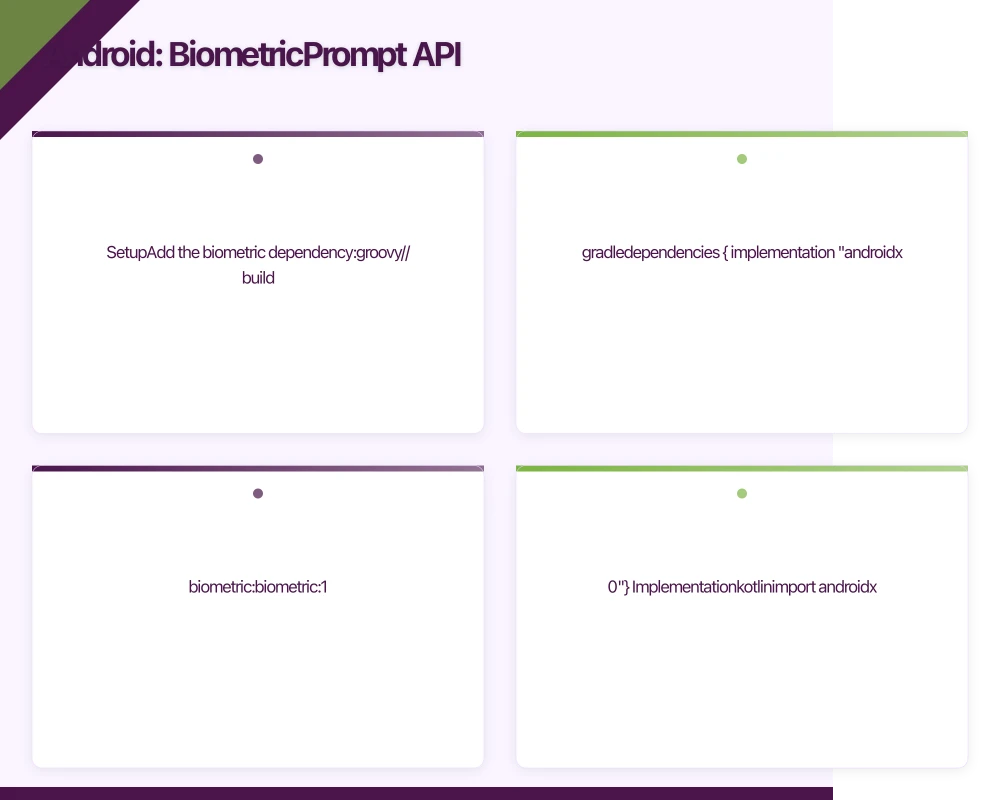
}Android: BiometricPrompt A
 PI
PI
Setup
Add the biometric dependency:
// build.gradle
dependencies {
    implementation "androidx.biometric:biometric:1.1.0"
}
Implementation
import androidx.biometric.BiometricManager
import androidx.biometric.BiometricPrompt
import androidx.core.content.ContextCompat
import androidx.fragment.app.FragmentActivity

class BiometricAuthManager(private val activity: FragmentActivity) {

    fun canAuthenticate(): Boolean {
        val biometricManager = BiometricManager.from(activity)
        return biometricManager.canAuthenticate(
            BiometricManager.Authenticators.BIOMETRIC_STRONG
        ) == BiometricManager.BIOMETRIC_SUCCESS
    }

    fun authenticate(
        title: String,
        subtitle: String,
        onSuccess: () -> Unit,
        onError: (String) -> Unit,
        onFailed: () -> Unit
    ) {
        val executor = ContextCompat.getMainExecutor(activity)

        val callback = object : BiometricPrompt.AuthenticationCallback() {
            override fun onAuthenticationSucceeded(
                result: BiometricPrompt.AuthenticationResult
            ) {
                super.onAuthenticationSucceeded(result)
                onSuccess()
            }

            override fun onAuthenticationError(
                errorCode: Int,
                errString: CharSequence
            ) {
                super.onAuthenticationError(errorCode, errString)
                when (errorCode) {
                    BiometricPrompt.ERROR_USER_CANCELED,
                    BiometricPrompt.ERROR_NEGATIVE_BUTTON -> {
                        // User dismissed the prompt
                    }
                    BiometricPrompt.ERROR_LOCKOUT -> {
                        onError("Too many attempts. Try again later.")
                    }
                    BiometricPrompt.ERROR_LOCKOUT_PERMANENT -> {
                        onError("Biometric locked. Use PIN to unlock.")
                    }
                    else -> onError(errString.toString())
                }
            }

            override fun onAuthenticationFailed() {
                super.onAuthenticationFailed()
                onFailed()
            }
        }

        val biometricPrompt = BiometricPrompt(activity, executor, callback)

        val promptInfo = BiometricPrompt.PromptInfo.Builder()
            .setTitle(title)
            .setSubtitle(subtitle)
            .setNegativeButtonText("Use password")
            .setAllowedAuthenticators(
                BiometricManager.Authenticators.BIOMETRIC_STRONG
            )
            .build()

        biometricPrompt.authenticate(promptInfo)
    }
}
Android Keystore with Biometrics
For storing credentials securely with biometric protection on Android:
import android.security.keystore.KeyGenParameterSpec
import android.security.keystore.KeyProperties
import java.security.KeyStore
import javax.crypto.Cipher
import javax.crypto.KeyGenerator
import javax.crypto.SecretKey

class BiometricCryptoManager {

    companion object {
        private const val KEY_NAME = "biometric_key"
        private const val KEYSTORE_PROVIDER = "AndroidKeyStore"
    }

    fun generateKey() {
        val keyGenerator = KeyGenerator.getInstance(
            KeyProperties.KEY_ALGORITHM_AES,
            KEYSTORE_PROVIDER
        )

        val spec = KeyGenParameterSpec.Builder(
            KEY_NAME,
            KeyProperties.PURPOSE_ENCRYPT or KeyProperties.PURPOSE_DECRYPT
        )
            .setBlockModes(KeyProperties.BLOCK_MODE_CBC)
            .setEncryptionPaddings(KeyProperties.ENCRYPTION_PADDING_PKCS7)
            .setUserAuthenticationRequired(true)
            .setInvalidatedByBiometricEnrollment(true)
            .build()

        keyGenerator.init(spec)
        keyGenerator.generateKey()
    }

    fun getCipher(): Cipher {
        val keyStore = KeyStore.getInstance(KEYSTORE_PROVIDER)
        keyStore.load(null)

        val key = keyStore.getKey(KEY_NAME, null) as SecretKey
        val cipher = Cipher.getInstance(
            "${KeyProperties.KEY_ALGORITHM_AES}/" +
            "${KeyProperties.BLOCK_MODE_CBC}/" +
            KeyProperties.ENCRYPTION_PADDING_PKCS7
        )
        cipher.init(Cipher.ENCRYPT_MODE, key)
        return cipher
    }

    fun authenticateWithCrypto(
        activity: FragmentActivity,
        onSuccess: (BiometricPrompt.CryptoObject) -> Unit
    ) {
        val cipher = getCipher()
        val cryptoObject = BiometricPrompt.CryptoObject(cipher)

        val executor = ContextCompat.getMainExecutor(activity)
        val callback = object : BiometricPrompt.AuthenticationCallback() {
            override fun onAuthenticationSucceeded(
                result: BiometricPrompt.AuthenticationResult
            ) {
                result.cryptoObject?.let { onSuccess(it) }
            }
        }

        val prompt = BiometricPrompt(activity, executor, callback)
        val promptInfo = BiometricPrompt.PromptInfo.Builder()
            .setTitle("Authenticate")
            .setSubtitle("Use biometrics to access secure data")
            .setNegativeButtonText("Cancel")
            .build()

        prompt.authenticate(promptInfo, cryptoObject)
    }
}
Security Best Practices
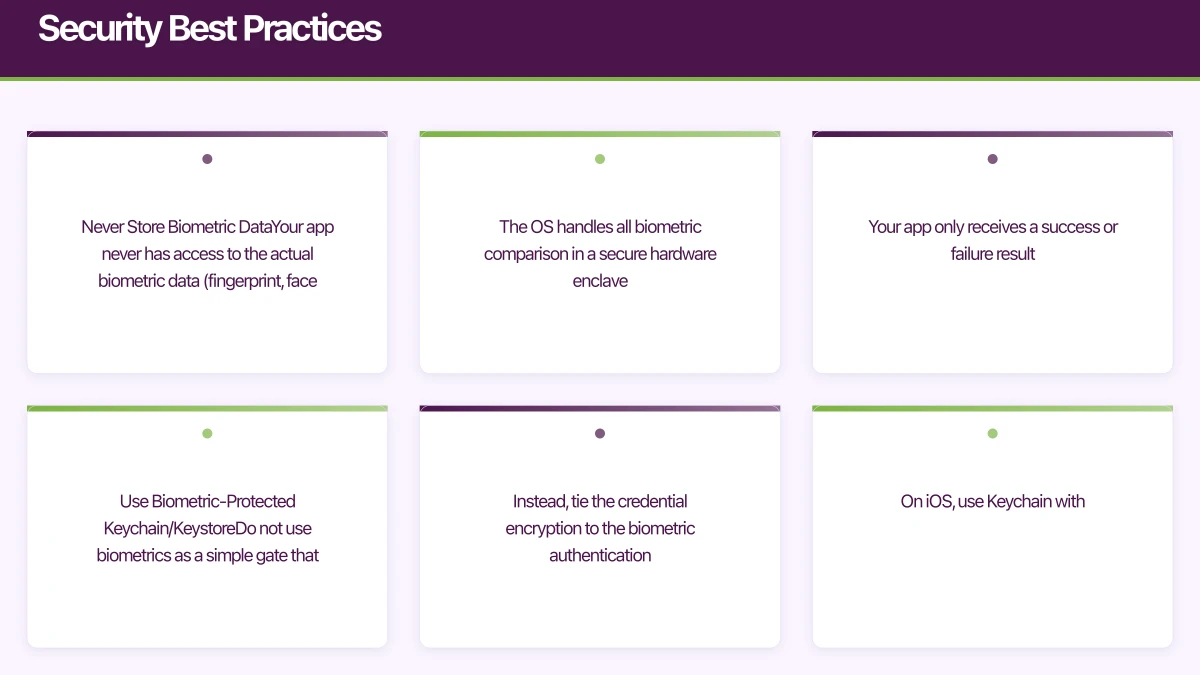
1. Never Store Biometric Data
Your app never has access to the actual biometric data (fingerprint, face map). The OS handles all biometric comparison in a secure hardware enclave. Your app only receives a success or failure result.
2. Use Biometric-Protected Keychain/Keystore
Do not use biometrics as a simple gate that shows or hides stored credentials. Instead, tie the credential encryption to the biometric authentication. On iOS, use Keychain with .biometryCurrentSet access control. On Android, use the Keystore with setUserAuthenticationRequired(true).
3. Invalidate on Biometric Changes
Both platforms support invalidating stored credentials when biometric data changes. Enable this to prevent a scenario where someone adds their fingerprint to a stolen device and gains access to your app’s stored credentials.
4. Always Provide a Fallback
Not all devices support biometrics, and biometric authentication can fail. Always provide an alternative authentication method (password, PIN, or passcode).
5. Do Not Force Biometrics
Make biometric authentication opt-in. Some users are uncomfortable with biometrics for privacy reasons. Respect their choice.
6. Session Management
Biometric authentication should complement, not replace, your session management:
func authenticateAndLogin() {
    biometricManager.authenticate(reason: "Log in to your account") { result in
        switch result {
        case .success:
            // Load stored credentials and authenticate with backend
            if let token = try? credentialStore.loadCredential(
                forKey: "refreshToken",
                reason: "Accessing stored credentials"
            ) {
                refreshSession(with: token)
            } else {
                // No stored credentials, show manual login
                showPasswordLogin()
            }
        case .failure(let error):
            handleAuthError(error)
        }
    }
}
Cross-Platform Implementation
React Native
For React Native, react-native-biometrics provides a unified API:
import ReactNativeBiometrics from 'react-native-biometrics';

const biometrics = new ReactNativeBiometrics();

async function checkBiometricAvailability() {
  const { available, biometryType } = await biometrics.isSensorAvailable();

  if (available) {
    // biometryType will be 'TouchID', 'FaceID', or 'Biometrics'
    return biometryType;
  }
  return null;
}

async function authenticateUser() {
  try {
    const { success } = await biometrics.simplePrompt({
      promptMessage: 'Log in to your account',
      cancelButtonText: 'Use password',
    });

    if (success) {
      // Proceed with authentication
      await loadAndRefreshCredentials();
    }
  } catch (error) {
    console.error('Biometric auth error:', error);
    showPasswordLogin();
  }
}
Flutter
Flutter uses the local_auth package:
import 'package:local_auth/local_auth.dart';

class BiometricAuth {
  final LocalAuthentication _auth = LocalAuthentication();

  Future<bool> isAvailable() async {
    final canCheck = await _auth.canCheckBiometrics;
    final isDeviceSupported = await _auth.isDeviceSupported();
    return canCheck && isDeviceSupported;
  }

  Future<bool> authenticate() async {
    try {
      return await _auth.authenticate(
        localizedReason: 'Please authenticate to access your account',
        options: const AuthenticationOptions(
          stickyAuth: true,
          biometricOnly: false,
        ),
      );
    } catch (e) {
      return false;
    }
  }
}
User Experience Guidelines
- Explain the benefit before enabling: Show users why biometric login is useful before prompting them to enable it
- Enable after first successful password login: The first time a user logs in with their password, offer to enable biometric login for next time
- Show the appropriate icon: Display a fingerprint icon for Touch ID and a face icon for Face ID
- Handle failures gracefully: After a failed biometric attempt, show the fallback option prominently
- Respect system settings: If the user has disabled biometrics at the system level, do not prompt them
Conclusion
Biometric authentication is a fundamental feature for modern mobile apps handling sensitive data. Both iOS and Android provide robust, secure APIs that handle the complexity of biometric data processing. Your job is to integrate these APIs correctly, provide appropriate fallbacks, and design a user experience that makes biometric login feel natural.
The security model is sound: biometric data never leaves the secure enclave, credentials are tied to biometric validation, and the OS handles all the sensitive comparison logic. Trust the platform APIs and focus on building a smooth authentication flow.
For help implementing secure biometric authentication in your mobile app, contact eawesome. We build secure, user-friendly authentication flows for Australian mobile applications.
A dedicated website amplifies your app’s reach. Cosmos Web Tech builds SEO-optimised sites that turn Google searches into app installs.
Awesome Apps operates under the Ganda Tech Services umbrella, delivering end-to-end technology solutions for Australian businesses.
Talk to a Sydney app developer — free.
30 minutes. We'll tell you what your app needs, how long it takes, and what it costs. Real answers, no sales pitch.
Book Free App Strategy Call →Free · 30 minutes · No obligation