Mobile App User Onboarding Best Practices for Converting Users
The first few minutes after a user opens your app determine whether they become active users or uninstall statistics. Industry data shows that 25% of apps are used only once after download. Effective mobile app development requires mastering user onboarding—how you guide new users to their first “aha moment” directly impacts your retention rates and long-term success.
After analysing onboarding flows across dozens of apps and running numerous experiments, we’ve identified the patterns that consistently drive activation. This guide covers the practical implementation of effective onboarding, from strategic principles to code patterns.
The Purpose of Onboarding
Onboarding isn’t about teaching users every feature. It’s about getting them to their first value moment as quickly as possible while collecting the minimum information needed to personalise their experience.
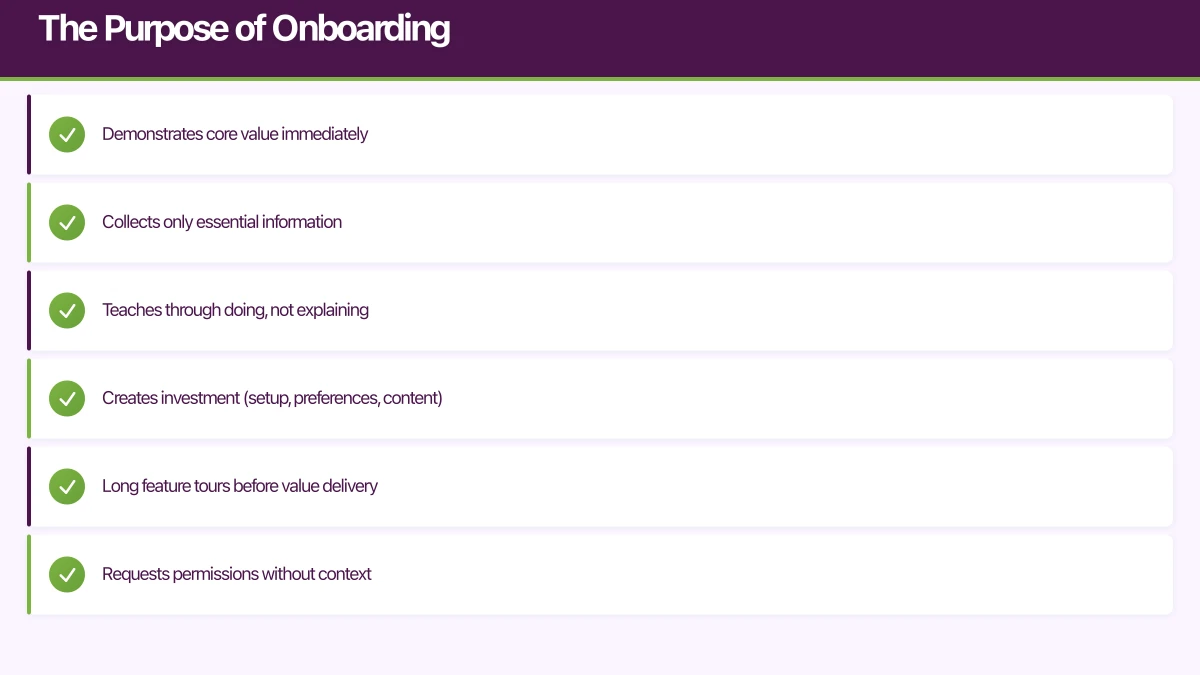
Good onboarding:
- Demonstrates core value immediately
- Collects only essential information
- Teaches through doing, not explaining
- Creates investment (setup, preferences, content)
Poor onboarding:
- Long feature tours before value delivery
- Requests permissions without context
- Requires account creation before experiencing the app
- Overwhelming information dumps
The metric that matters: time to first value. How quickly can a user accomplish the thing they downloaded your app to do?
Onboarding Patterns That W
 ork
ork
Pattern 1: Progressive Disclosure
Don’t show everything at once. Introduce features as users encounter them naturally.
// React Native: Progressive feature revelation
import { useOnboarding } from './hooks/useOnboarding';

function FeedScreen() {
  const { hasSeenFeature, markFeatureSeen } = useOnboarding();
  const [showTooltip, setShowTooltip] = useState(false);

  // Show filter tooltip on third visit
  useEffect(() => {
    if (!hasSeenFeature('filter_tooltip') && visitCount >= 3) {
      setShowTooltip(true);
    }
  }, [visitCount, hasSeenFeature]);

  return (
    <View style={styles.container}>
      <Header
        rightAction={
          <View>
            <FilterButton onPress={openFilters} />
            {showTooltip && (
              <Tooltip
                text="Filter posts by category"
                onDismiss={() => {
                  setShowTooltip(false);
                  markFeatureSeen('filter_tooltip');
                }}
              />
            )}
          </View>
        }
      />
      <FeedList />
    </View>
  );
}

// Onboarding state management
function useOnboarding() {
  const [state, setState] = useState<OnboardingState>(() =>
    loadOnboardingState()
  );

  const hasSeenFeature = useCallback(
    (feature: string) => state.seenFeatures.includes(feature),
    [state]
  );

  const markFeatureSeen = useCallback((feature: string) => {
    setState(current => {
      const updated = {
        ...current,
        seenFeatures: [...current.seenFeatures, feature],
      };
      saveOnboardingState(updated);
      return updated;
    });

    analytics.track('onboarding_feature_seen', { feature });
  }, []);

  return { hasSeenFeature, markFeatureSeen };
}
Pattern 2: Value-First, Account Later
Let users experience value before requiring commitment.
// Allow core functionality without account
function AppNavigator() {
  const { user, isAnonymous } = useAuth();

  return (
    <Stack.Navigator>
      {/* Core features available to everyone */}
      <Stack.Screen name="Feed" component={FeedScreen} />
      <Stack.Screen name="Detail" component={DetailScreen} />
      <Stack.Screen name="Search" component={SearchScreen} />

      {/* Gate features that require accounts */}
      <Stack.Screen
        name="SaveItem"
        component={isAnonymous ? PromptSignUpScreen : SaveItemScreen}
      />
      <Stack.Screen
        name="CreatePost"
        component={isAnonymous ? PromptSignUpScreen : CreatePostScreen}
      />
    </Stack.Navigator>
  );
}

// Contextual sign-up prompt
function PromptSignUpScreen({ route }: Props) {
  const { intendedAction } = route.params;

  const messages = {
    save: "Create a free account to save items and access them anywhere",
    create: "Sign up to share your own posts with the community",
    follow: "Create an account to follow creators and personalise your feed",
  };

  return (
    <View style={styles.container}>
      <Text style={styles.heading}>Almost there!</Text>
      <Text style={styles.message}>{messages[intendedAction]}</Text>

      <Button
        title="Continue with Apple"
        onPress={() => signInWithApple()}
        style={styles.primaryButton}
      />
      <Button
        title="Continue with Google"
        onPress={() => signInWithGoogle()}
        style={styles.secondaryButton}
      />
      <Button
        title="Create account with email"
        onPress={() => navigate('EmailSignUp')}
        style={styles.tertiaryButton}
      />

      <TouchableOpacity onPress={() => goBack()}>
        <Text style={styles.skipText}>Maybe later</Text>
      </TouchableOpacity>
    </View>
  );
}
Pattern 3: Contextual Permission Requests
Request permissions when users understand why they’re needed.
// Bad: Request all permissions upfront
function BadOnboarding() {
  useEffect(() => {
    // User has no idea why they need these
    requestNotificationPermission();
    requestLocationPermission();
    requestCameraPermission();
  }, []);
}

// Good: Request permissions in context
function GoodOnboarding() {
  // No upfront permission requests
}

function NearbyScreen() {
  const [locationPermission, setLocationPermission] = useState<PermissionStatus>();

  const handleFindNearby = async () => {
    if (locationPermission !== 'granted') {
      // Explain value before requesting
      const shouldRequest = await showExplanationModal({
        title: "Find places near you",
        message: "We'll use your location to show relevant results. Your location is never shared with other users.",
        benefit: "See what's popular in your area",
      });

      if (shouldRequest) {
        const status = await requestLocationPermission();
        setLocationPermission(status);

        if (status === 'granted') {
          loadNearbyResults();
        }
      }
    } else {
      loadNearbyResults();
    }
  };

  return (
    <View>
      <Button title="Find places near me" onPress={handleFindNearby} />
    </View>
  );
}

function NotificationPrompt() {
  // Show after user completes a key action
  const { completedActions } = useOnboarding();

  useEffect(() => {
    if (completedActions.includes('first_save') && !hasAskedNotifications) {
      // User just saved something - good time to ask about notifications
      setTimeout(() => {
        showNotificationPrompt({
          title: "Stay updated",
          message: "Get notified when items you've saved go on sale or have new activity",
          primaryAction: "Enable notifications",
          secondaryAction: "Not now",
        });
      }, 500);
    }
  }, [completedActions]);
}
Pattern 4: Personalisation During Onboarding
Collect preferences that improve the initial experience.
// Interest selection during onboarding
function InterestSelectionScreen({ onComplete }: Props) {
  const [selectedInterests, setSelectedInterests] = useState<string[]>([]);

  const interests = [
    { id: 'technology', label: 'Technology', icon: 'laptop' },
    { id: 'fitness', label: 'Fitness', icon: 'dumbbell' },
    { id: 'cooking', label: 'Cooking', icon: 'utensils' },
    { id: 'travel', label: 'Travel', icon: 'plane' },
    { id: 'music', label: 'Music', icon: 'music' },
    { id: 'gaming', label: 'Gaming', icon: 'gamepad' },
  ];

  const toggleInterest = (id: string) => {
    setSelectedInterests(current =>
      current.includes(id)
        ? current.filter(i => i !== id)
        : [...current, id]
    );
  };

  const handleContinue = async () => {
    // Save preferences
    await saveUserPreferences({ interests: selectedInterests });

    // Track for analytics
    analytics.setUserProperties({
      interests: selectedInterests,
      onboarding_interests_count: selectedInterests.length,
    });

    analytics.track('onboarding_interests_selected', {
      interests: selectedInterests,
      count: selectedInterests.length,
    });

    onComplete();
  };

  return (
    <View style={styles.container}>
      <Text style={styles.heading}>What interests you?</Text>
      <Text style={styles.subheading}>
        Select at least 3 topics to personalise your experience
      </Text>

      <View style={styles.grid}>
        {interests.map(interest => (
          <InterestChip
            key={interest.id}
            label={interest.label}
            icon={interest.icon}
            selected={selectedInterests.includes(interest.id)}
            onPress={() => toggleInterest(interest.id)}
          />
        ))}
      </View>

      <View style={styles.footer}>
        <Button
          title="Continue"
          onPress={handleContinue}
          disabled={selectedInterests.length < 3}
        />
        <TouchableOpacity onPress={() => onComplete()}>
          <Text style={styles.skipText}>Skip for now</Text>
        </TouchableOpacity>
      </View>
    </View>
  );
}
Implementing Onboar
 ding Flows
State Machine for Complex Onboarding
import { createMachine, assign } from 'xstate';
import { useMachine } from '@xstate/react';

interface OnboardingContext {
  name: string;
  interests: string[];
  notificationsEnabled: boolean;
  completedSteps: string[];
}

type OnboardingEvent =
  | { type: 'SET_NAME'; name: string }
  | { type: 'SELECT_INTERESTS'; interests: string[] }
  | { type: 'ENABLE_NOTIFICATIONS' }
  | { type: 'SKIP_NOTIFICATIONS' }
  | { type: 'NEXT' }
  | { type: 'BACK' };

const onboardingMachine = createMachine<OnboardingContext, OnboardingEvent>({
  id: 'onboarding',
  initial: 'welcome',
  context: {
    name: '',
    interests: [],
    notificationsEnabled: false,
    completedSteps: [],
  },
  states: {
    welcome: {
      on: {
        NEXT: 'name',
      },
    },
    name: {
      on: {
        SET_NAME: {
          actions: assign({ name: (_, event) => event.name }),
        },
        NEXT: {
          target: 'interests',
          cond: (context) => context.name.length > 0,
        },
        BACK: 'welcome',
      },
    },
    interests: {
      on: {
        SELECT_INTERESTS: {
          actions: assign({ interests: (_, event) => event.interests }),
        },
        NEXT: {
          target: 'notifications',
          cond: (context) => context.interests.length >= 3,
        },
        BACK: 'name',
      },
    },
    notifications: {
      on: {
        ENABLE_NOTIFICATIONS: {
          target: 'complete',
          actions: assign({ notificationsEnabled: true }),
        },
        SKIP_NOTIFICATIONS: 'complete',
        BACK: 'interests',
      },
    },
    complete: {
      type: 'final',
      entry: ['saveOnboardingData', 'trackOnboardingComplete'],
    },
  },
});

function OnboardingNavigator() {
  const [state, send] = useMachine(onboardingMachine);

  const screens = {
    welcome: <WelcomeScreen onNext={() => send('NEXT')} />,
    name: (
      <NameScreen
        value={state.context.name}
        onChange={(name) => send({ type: 'SET_NAME', name })}
        onNext={() => send('NEXT')}
        onBack={() => send('BACK')}
      />
    ),
    interests: (
      <InterestScreen
        selected={state.context.interests}
        onChange={(interests) => send({ type: 'SELECT_INTERESTS', interests })}
        onNext={() => send('NEXT')}
        onBack={() => send('BACK')}
      />
    ),
    notifications: (
      <NotificationScreen
        onEnable={() => send('ENABLE_NOTIFICATIONS')}
        onSkip={() => send('SKIP_NOTIFICATIONS')}
        onBack={() => send('BACK')}
      />
    ),
    complete: null,
  };

  if (state.matches('complete')) {
    return <Navigate to="Home" />;
  }

  return (
    <View style={styles.container}>
      <ProgressIndicator
        steps={['welcome', 'name', 'interests', 'notifications']}
        currentStep={state.value as string}
      />
      {screens[state.value as keyof typeof screens]}
    </View>
  );
}
Resumable Onboarding
Users might close the app mid-onboarding. Handle this gracefully.
// Persist onboarding state
const ONBOARDING_STATE_KEY = 'onboarding_state';

async function saveOnboardingState(state: OnboardingState) {
  await AsyncStorage.setItem(ONBOARDING_STATE_KEY, JSON.stringify(state));
}

async function loadOnboardingState(): Promise<OnboardingState | null> {
  const saved = await AsyncStorage.getItem(ONBOARDING_STATE_KEY);
  return saved ? JSON.parse(saved) : null;
}

async function clearOnboardingState() {
  await AsyncStorage.removeItem(ONBOARDING_STATE_KEY);
}

// App entry point
function App() {
  const [isLoading, setIsLoading] = useState(true);
  const [initialRoute, setInitialRoute] = useState<string>('Home');

  useEffect(() => {
    async function checkOnboardingState() {
      const user = await getCurrentUser();

      if (!user) {
        // New user
        setInitialRoute('Onboarding');
      } else if (!user.onboardingComplete) {
        // Returning user with incomplete onboarding
        const savedState = await loadOnboardingState();
        if (savedState) {
          // Resume from where they left off
          setInitialRoute(`Onboarding_${savedState.lastStep}`);
        } else {
          setInitialRoute('Onboarding');
        }
      } else {
        // Completed user
        setInitialRoute('Home');
      }

      setIsLoading(false);
    }

    checkOnboardingState();
  }, []);

  if (isLoading) {
    return <SplashScreen />;
  }

  return (
    <NavigationContainer>
      <Stack.Navigator initialRouteName={initialRoute}>
        {/* ... */}
      </Stack.Navigator>
    </NavigationContainer>
  );
}
Measuring Onboardi
ng Success
Track metrics that indicate onboarding effectiveness.
// Key onboarding metrics
class OnboardingAnalytics {
  // Track funnel progression
  trackStepViewed(step: string, stepIndex: number) {
    analytics.track('onboarding_step_viewed', {
      step,
      step_index: stepIndex,
      session_id: this.sessionId,
    });
  }

  trackStepCompleted(step: string, stepIndex: number, timeSpentMs: number) {
    analytics.track('onboarding_step_completed', {
      step,
      step_index: stepIndex,
      time_spent_ms: timeSpentMs,
      session_id: this.sessionId,
    });
  }

  // Track drop-off points
  trackOnboardingAbandoned(lastStep: string, lastStepIndex: number) {
    analytics.track('onboarding_abandoned', {
      last_step: lastStep,
      last_step_index: lastStepIndex,
      total_time_ms: Date.now() - this.startTime,
      session_id: this.sessionId,
    });
  }

  // Track completion
  trackOnboardingCompleted(totalTimeMs: number, skippedSteps: string[]) {
    analytics.track('onboarding_completed', {
      total_time_ms: totalTimeMs,
      skipped_steps: skippedSteps,
      skipped_count: skippedSteps.length,
      session_id: this.sessionId,
    });

    // Set user property for cohort analysis
    analytics.setUserProperties({
      onboarding_completed: true,
      onboarding_completed_date: new Date().toISOString(),
      onboarding_skipped_steps: skippedSteps.length,
    });
  }

  // Track activation events
  trackActivationEvent(event: string, daysSinceOnboarding: number) {
    analytics.track('activation_event', {
      event,
      days_since_onboarding: daysSinceOnboarding,
    });
  }
}

// Activation metric: Did the user reach "aha moment"?
function useActivationTracking() {
  const { user } = useAuth();

  // Define your activation criteria
  const activationCriteria = {
    firstContentCreated: false,
    firstItemSaved: false,
    firstShare: false,
    returnedNextDay: false,
  };

  useEffect(() => {
    if (user?.onboardingCompletedAt) {
      const daysSinceOnboarding = Math.floor(
        (Date.now() - user.onboardingCompletedAt) / (1000 * 60 * 60 * 24)
      );

      // Track D1, D7, D30 retention
      if (daysSinceOnboarding === 1) {
        analytics.track('retention_d1');
      } else if (daysSinceOnboarding === 7) {
        analytics.track('retention_d7');
      } else if (daysSinceOnboarding === 30) {
        analytics.track('retention_d30');
      }
    }
  }, [user]);
}
Frequently Asked Questions About Mobile App Onboarding
What is the ideal length for a mobile app onboarding flow?
The optimal mobile app development onboarding should take 30-90 seconds. Users want to experience value quickly, not sit through lengthy tutorials. Focus on showing the minimum information needed to complete one valuable action.
How many onboarding screens should a mobile app have?
Best practice for mobile app development suggests 3-5 onboarding screens maximum. Each screen should communicate one clear benefit. Consider using progressive disclosure to teach features as users encounter them naturally rather than upfront.
What metrics indicate successful user onboarding?
Track completion rate (users who finish onboarding), time to first value, D1/D7/D30 retention, and activation rate. In mobile app development, a 60%+ onboarding completion rate is considered good, while 80%+ is excellent.
Should mobile apps require account creation before onboarding?
No. Modern mobile app development prioritizes value-first experiences. Let users explore core features before requiring account creation. This approach increases activation rates by 40-60% compared to forced registration.
How often should mobile app onboarding be updated?
Review and test your onboarding quarterly. Run A/B tests on messaging, flow order, and visual design. Data-driven mobile app development teams continuously optimize onboarding based on user behavior analytics.
Key Takeaways: Mobile App Onboarding Excellence
Industry Benchmark: 25% of apps are abandoned after a single use, making effective onboarding critical for mobile app development success.
Proven Pattern: Value-first onboarding that demonstrates core functionality before requesting permissions increases activation rates by 40-60%.
Retention Impact: Users who complete onboarding are 3-5 times more likely to become long-term paying customers, according to mobile app development studies.
Conclusion
Effective onboarding is the highest-leverage investment you can make in your app’s growth. Users who successfully complete onboarding are dramatically more likely to become long-term, paying customers.
The principles that drive mobile app development success:
- Value first: Get users to their “aha moment” before asking for anything
- Progressive disclosure: Teach features when users need them
- Contextual permissions: Request access when the benefit is clear
- Personalisation: Collect preferences that improve the experience
- Measure relentlessly: Track your funnel and optimise weak points
Onboarding isn’t a one-time project. The best teams continuously experiment with their onboarding flows, running A/B tests to improve completion rates and activation metrics. A 10% improvement in onboarding completion can translate to millions in lifetime value.
Looking for expert guidance on mobile app development and user onboarding? Explore our mobile app performance guide or learn about real-time features to enhance your app’s engagement.
Need help designing an onboarding flow that converts? The Awesome Apps team has optimised onboarding for apps across Australia. Contact us to discuss your user activation strategy.
Your app needs secure, low-latency APIs. Cloud Geeks builds and manages cloud backends optimised for mobile applications.
Awesome Apps is the mobile development division of Ganda Tech Services, building iOS and Android apps for Australian businesses.
Talk to a Sydney app developer — free.
30 minutes. We'll tell you what your app needs, how long it takes, and what it costs. Real answers, no sales pitch.
Book Free App Strategy Call →Free · 30 minutes · No obligation