Push Notification Best Practices for Mobile Apps
Push notifications are one of the most powerful tools in a mobile app developer’s arsenal. Done well, they drive engagement, retention, and revenue. Done poorly, they drive uninstalls.
The difference between a notification that delights and one that annoys comes down to strategy. In this guide, we will cover the principles, technical implementation, and tactical approaches that separate effective push notification systems from spam.
The Permission Challenge
Before you can send a single notification, you need permission. On iOS, this is an explicit opt-in prompt. On Android, notifications are enabled by default (though users can disable them), but best practice is to treat both platforms as requiring an opt-in mindset.
iOS Permission Strategy
On iOS, you get one chance to ask for notification permission with the system prompt. If the user declines, sending them to Settings to re-enable notifications is a high-friction recovery path. Make that first ask count.
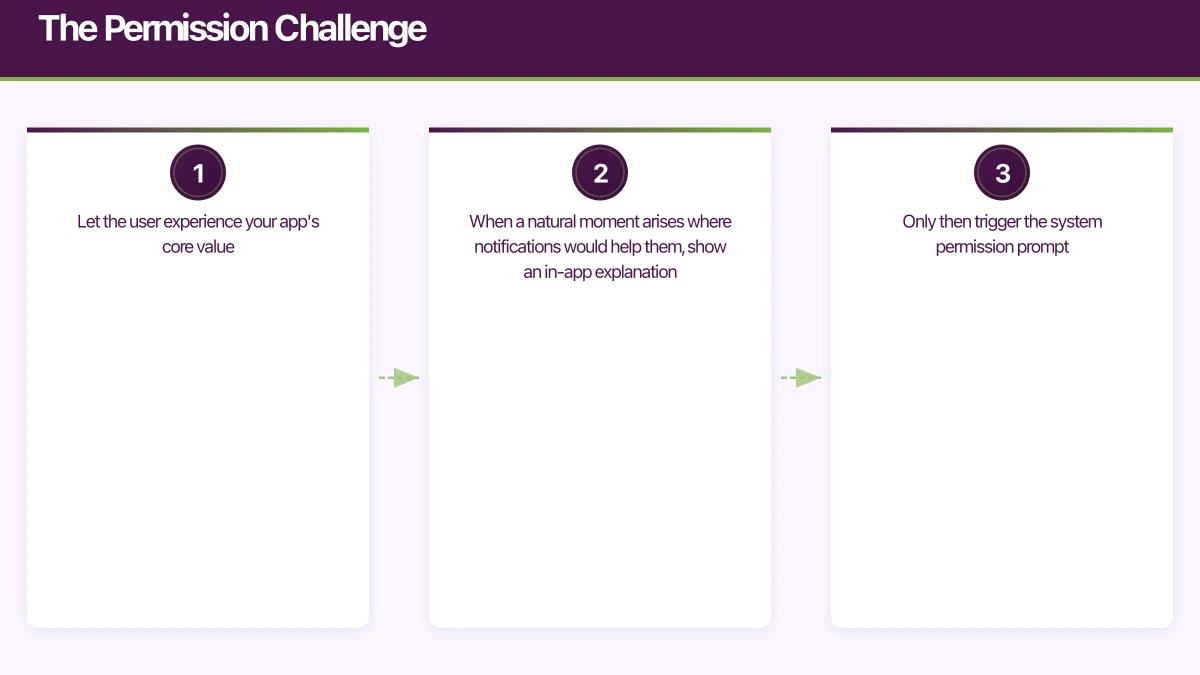
Do not ask on first launch. The user has no relationship with your app yet. They do not know if your notifications are valuable or annoying.
Instead, use a pre-permission pattern:
- Let the user experience your app’s core value
- When a natural moment arises where notifications would help them, show an in-app explanation
- Only then trigger the system permission prompt
For example, if your app is a task manager, wait until the user creates their first task with a due date, then explain: “Would you like to be reminded when tasks are due? We will send you a notification before each deadline.”
This approach typically achieves 60 to 70 percent opt-in rates, compared to 40 to 50 percent for cold prompts on first launch.
Android Notification Channels
Android 8.0 introduced notification channels, which let users control notifications at a granular level. This is actually an advantage. By creating well-organised channels, you give users control over which notifications they receive, reducing the likelihood they disable all notifications.
// Creating notification channels in Android
val channels = listOf(
    NotificationChannel(
        "task_reminders",
        "Task Reminders",
        NotificationManager.IMPORTANCE_HIGH
    ).apply {
        description = "Reminders for upcoming task deadlines"
    },
    NotificationChannel(
        "weekly_summary",
        "Weekly Summary",
        NotificationManager.IMPORTANCE_LOW
    ).apply {
        description = "Weekly progress summary"
    },
    NotificationChannel(
        "social_updates",
        "Social Updates",
        NotificationManager.IMPORTANCE_DEFAULT
    ).apply {
        description = "Updates from your team members"
    }
)

val notificationManager = getSystemService(NotificationManager::class.java)
channels.forEach { notificationManager.createNotificationChannel(it) }
Choose importance levels carefully. Not every notification deserves to make a sound or vibrate the device.
Content That Conver
ts
The content of your notification determines whether users tap, dismiss, or uninstall. Every notification should pass three tests:
- Is it timely? The information is relevant right now, not tomorrow.
- Is it personal? The notification is specific to this user’s context.
- Is it actionable? The user can do something meaningful after tapping.
Writing Effective Notification Copy
Keep titles under 50 characters. Keep body text under 150 characters. Front-load the most important information because notifications are often truncated on lock screens.
Good examples:
- “Your order has shipped. Track delivery.” (transactional, timely)
- “Sarah commented on your project” (social, personal)
- “Flash sale: 40% off until midnight” (time-sensitive, actionable)
Bad examples:
- “Hey! We miss you. Come back and check out our new features!” (generic, not personal)
- “New update available” (not actionable, not specific)
- “Do not forget to use our app today!” (no value, annoying)
Rich Notifications
Both iOS and Android support rich notifications with images, action buttons, and expandable content. Use these capabilities to make notifications more engaging:
// iOS rich notification with image and actions
let content = UNMutableNotificationContent()
content.title = "Project Update"
content.body = "3 tasks completed today. Review your progress."
content.categoryIdentifier = "PROGRESS_UPDATE"

// Attach image
if let imageURL = Bundle.main.url(forResource: "progress", withExtension: "png") {
    let attachment = try UNNotificationAttachment(
        identifier: "progress-image",
        url: imageURL
    )
    content.attachments = [attachment]
}

// Define actions
let viewAction = UNNotificationAction(
    identifier: "VIEW_PROGRESS",
    title: "View Details",
    options: .foreground
)
let dismissAction = UNNotificationAction(
    identifier: "DISMISS",
    title: "Dismiss",
    options: .destructive
)

let category = UNNotificationCategory(
    identifier: "PROGRESS_UPDATE",
    actions: [viewAction, dismissAction],
    intentIdentifiers: []
)
Action buttons reduce the need to open the app for simple interactions, which users appreciate.
Timing and Frequency
When to Send
The optimal send time varies by app category and user behaviour. General guidelines for the Australian market:
- Morning (7:00 to 9:00 AEST): Good for news, weather, daily briefings
- Midday (12:00 to 13:00): Good for food delivery, casual content
- Evening (17:00 to 20:00): Good for entertainment, social updates
- Avoid late night (22:00 to 7:00): Unless time-critical (e.g., security alerts)
The best approach is to learn each user’s engagement patterns and send during their active hours. Most notification services (Firebase Cloud Messaging, OneSignal) support timezone-aware delivery.
How Often to Send
There is no universal answer, but research consistently shows that more notifications lead to higher uninstall rates beyond a threshold. General benchmarks:
- Transactional apps (banking, delivery): As needed. Users expect timely updates.
- Content apps (news, social): 3 to 5 per day maximum for highly engaged users, 1 per day for casual users.
- Utility apps (productivity, fitness): 1 to 2 per day maximum.
- E-commerce apps: 2 to 3 per week maximum.
Monitor your opt-out rates. If you see a spike in users disabling notifications, you are sending too many or the content is not valuable enough.
Segmentation and Personalisation
Sending the same notification to your entire user base is almost always wrong. Effective notification strategies segment users and personalise content.
Segmentation Approaches
Behavioural segmentation: Group users by their in-app behaviour. Power users get different notifications than casual users. Users who browse but do not buy get different messages than frequent purchasers.
Lifecycle segmentation: New users need onboarding nudges. Active users benefit from feature discovery. At-risk users (declining engagement) need re-engagement campaigns. Lapsed users need win-back messages.
Preference-based segmentation: Let users choose what they want to be notified about. This is the most respectful approach and yields the highest engagement rates.
Implementation with Firebase Cloud Messaging
Firebase Cloud Messaging (FCM) is the most common push notification service for both iOS and Android. Here is how to implement topic-based segmentation:
// Subscribe user to topics based on preferences
const subscribeToTopics = async (userId, preferences) => {
  const token = await messaging().getToken();

  if (preferences.taskReminders) {
    await messaging().subscribeToTopic('task-reminders');
  }
  if (preferences.weeklyDigest) {
    await messaging().subscribeToTopic('weekly-digest');
  }
  if (preferences.productUpdates) {
    await messaging().subscribeToTopic('product-updates');
  }
};

// Send to a specific topic
const admin = require('firebase-admin');
await admin.messaging().send({
  topic: 'task-reminders',
  notification: {
    title: 'Task Due Soon',
    body: '3 tasks due today. Review your priorities.',
  },
  data: {
    screen: 'tasks',
    filter: 'due-today',
  },
});
For more advanced segmentation, use conditional targeting or send to specific device tokens.
Deep Linking from Notifications
A notification that opens the app’s home screen is a wasted opportunity. Every notification should deep link to the relevant content or action.
Implementation Pattern
Include routing data in your notification payload:
{
  "notification": {
    "title": "New comment on your project",
    "body": "Sarah: 'Looks great, just one suggestion...'"
  },
  "data": {
    "type": "comment",
    "projectId": "proj_123",
    "commentId": "comment_456"
  }
}
Handle the deep link in your app:
// iOS: Handle notification tap
func userNotificationCenter(
    _ center: UNUserNotificationCenter,
    didReceive response: UNNotificationResponse,
    withCompletionHandler completionHandler: @escaping () -> Void
) {
    let data = response.notification.request.content.userInfo

    if let type = data["type"] as? String {
        switch type {
        case "comment":
            let projectId = data["projectId"] as? String ?? ""
            let commentId = data["commentId"] as? String ?? ""
            navigateToComment(projectId: projectId, commentId: commentId)
        case "task_reminder":
            let taskId = data["taskId"] as? String ?? ""
            navigateToTask(taskId: taskId)
        default:
            break
        }
    }

    completionHandler()
}
Measuring Notification Effectiveness
Track these metrics to evaluate and improve your notification strategy:
Key Metrics
- Opt-in rate: Percentage of users who grant notification permission. Benchmark: 60 percent or higher with pre-permission patterns.
- Delivery rate: Percentage of sent notifications that reach devices. Should be over 95 percent. Lower rates indicate stale tokens.
- Open rate: Percentage of delivered notifications that users tap. Industry average is 5 to 8 percent. Good performance is over 10 percent.
- Conversion rate: Percentage of notification opens that lead to a desired action. This varies widely by notification type.
- Opt-out rate: Percentage of users who disable notifications after receiving them. Monitor for spikes after specific campaigns.
A/B Testing
Test notification copy, timing, and frequency systematically. Most push notification platforms support A/B testing:
- Split your audience randomly
- Send variant A to one group and variant B to the other
- Measure open rates and downstream conversions
- Apply learnings to future notifications
Even small improvements compound over time. A 2 percent improvement in open rate across thousands of daily notifications translates to meaningful engagement gains.
Common Mistakes to Avoid
- Asking for permission on first launch. Wait for context.
- Sending the same message to everyone. Segment and personalise.
- Ignoring time zones. Australian users span multiple time zones (AEST, ACST, AWST). Respect them.
- No deep linking. Every tap should go somewhere specific.
- Not cleaning up stale tokens. Remove device tokens that consistently fail delivery.
- Over-sending. When in doubt, send fewer notifications.
- Ignoring notification analytics. You cannot improve what you do not measure.
Getting Started
If you are implementing push notifications for the first time, start here:
- Set up Firebase Cloud Messaging for cross-platform delivery
- Implement the pre-permission pattern on iOS
- Create notification channels on Android
- Build deep linking for your key notification types
- Set up analytics to track opt-in, delivery, and open rates
- Start with transactional notifications (they provide clear value)
- Gradually add engagement notifications based on user segments
Push notifications are a privilege, not a right. Every notification you send should earn the user’s continued trust. At eawesome, we help Australian app developers build notification systems that drive engagement without driving users away.
Thinking beyond the app to your overall digital roadmap? Ash Ganda shares strategic insights for Australian technology leaders.
Ashish Ganda is the founder of Ganda Tech Services, a Sydney-based technology consultancy helping Australian businesses grow through cloud, web, and mobile solutions.
Talk to a Sydney app developer — free.
30 minutes. We'll tell you what your app needs, how long it takes, and what it costs. Real answers, no sales pitch.
Book Free App Strategy Call →Free · 30 minutes · No obligation